Introduction:
Building automations inside of Automatescascale has never been so effortless and productive. Due to the latest techniques and digital developments Automatescale offers features that make it easier for you to manage your online business.
If you already have an Automatescale account but you face issues in dealing with automations, we offer you a full guide to master Automatescale features. Here you’ll learn everything about automations inside Automatescale. After reading this blog post you can build any automaton you prefer for your business needs.
Setting Up Phone Numbers and Email Services
First, you need to set up several important things to allow your automations work. Under your account settings you’ll find phone numbers and email services. Get your phone number/s and email services approved and verified according to your area. Once your phone number/s and email services are set up your automations will send out.
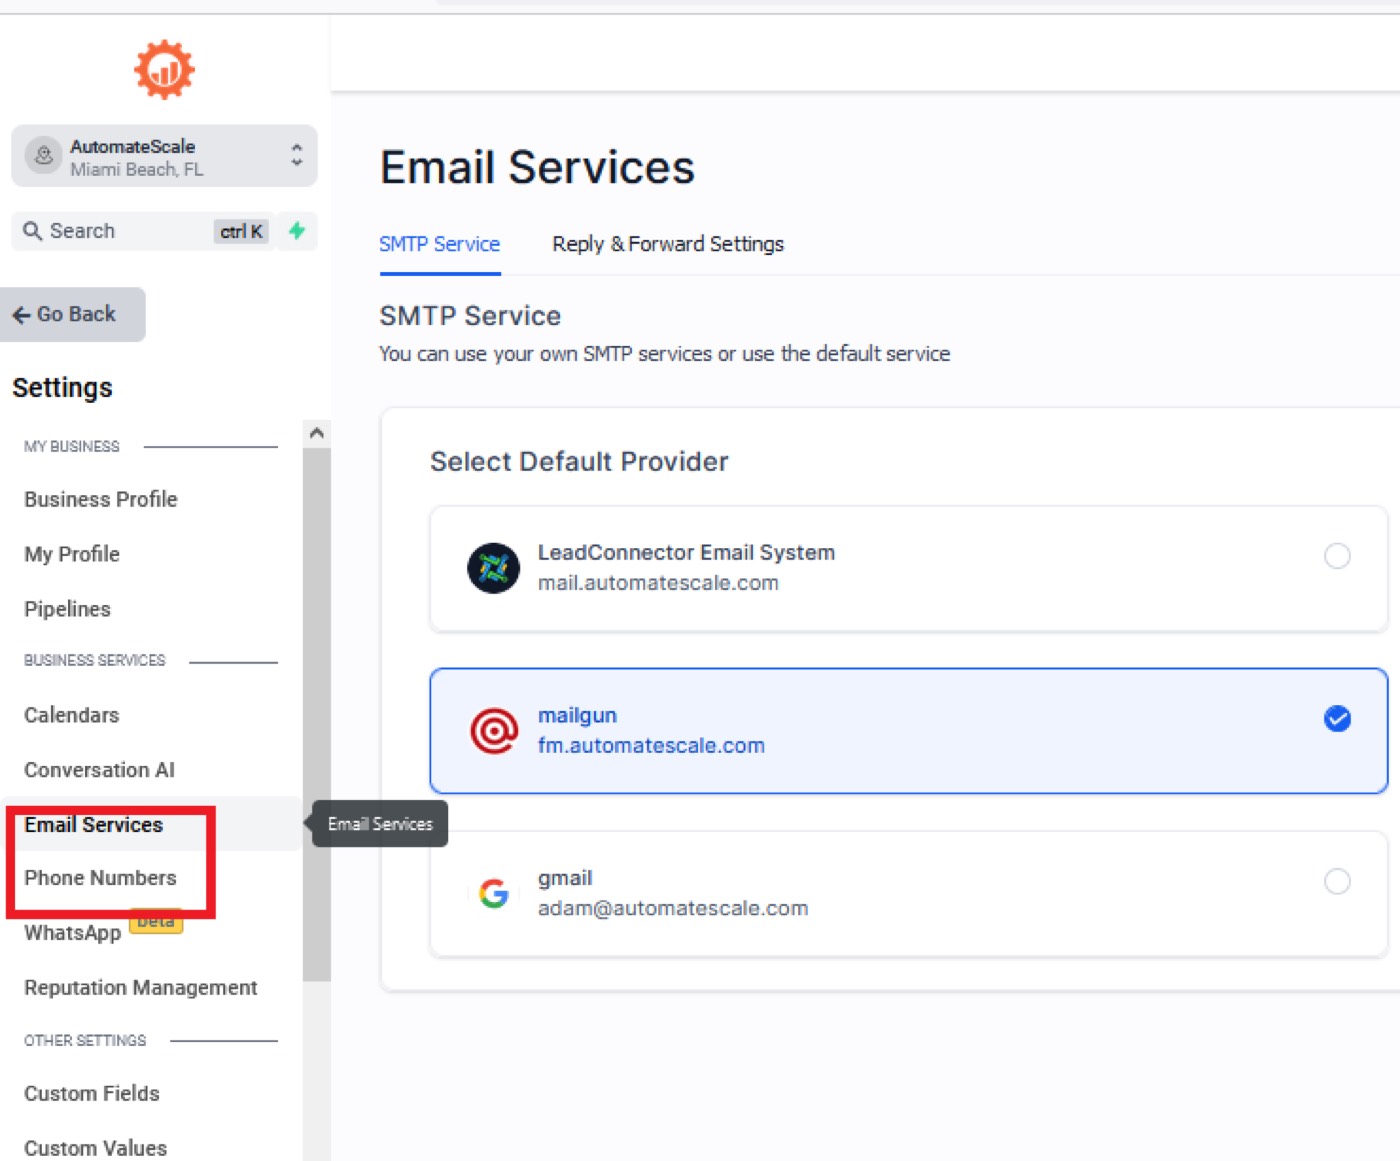
This is an important step because the majority of what you are going to send with automations are text messages and emails and that’s where money is made with Automatescale. Your customers take actions and fill out forms, book appointments, buy digital products etc, through the text messages and emails you send. So, there are many different things that can trigger automation but your number one task is to discover how it all starts and works.
Trigger Features and Events
When creating a workflow in an automation you should know that it has a workflow trigger which is a sequence of features and actions that make an automation flow. Triggers are meant to connect different features and tools. You can start creating a workflow from scratch using all the necessary trigger features for automation. Triggers are basically performed when the customer takes an action. Thus, you need to set up triggers (conditional actions) according to events that may trigger the automation.
The core fields where you need to use trigger features are
Marketing: text messages, emails.
Scheduling: appointment bookings, e-meetings,
Reputation: sending review requests.
Contacts: gaining as many contacts as possible.
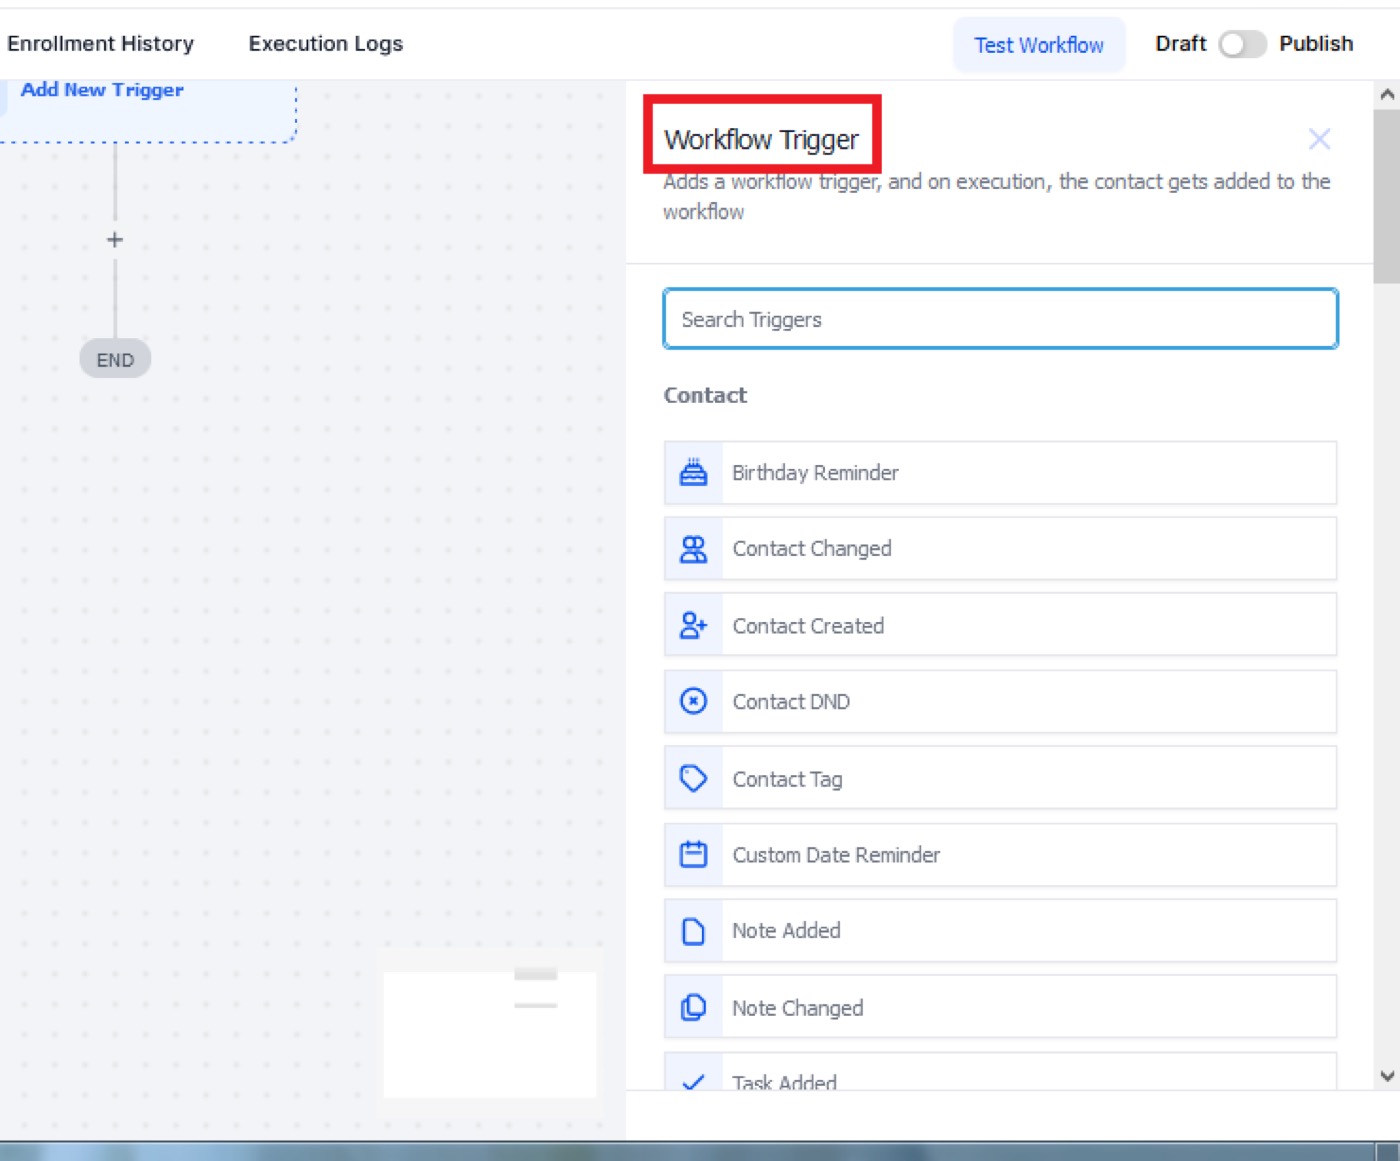
To set up a trigger you need to
Go to Automation, Click on ‘+Create Workflow’.
Select either a ‘Recipe’ or ‘Start from Scratch’.
Name the workflow according to your preferences.
Choose your event(s), add your action and click ‘Publish’ and ‘Save’.
Form Submitted Action
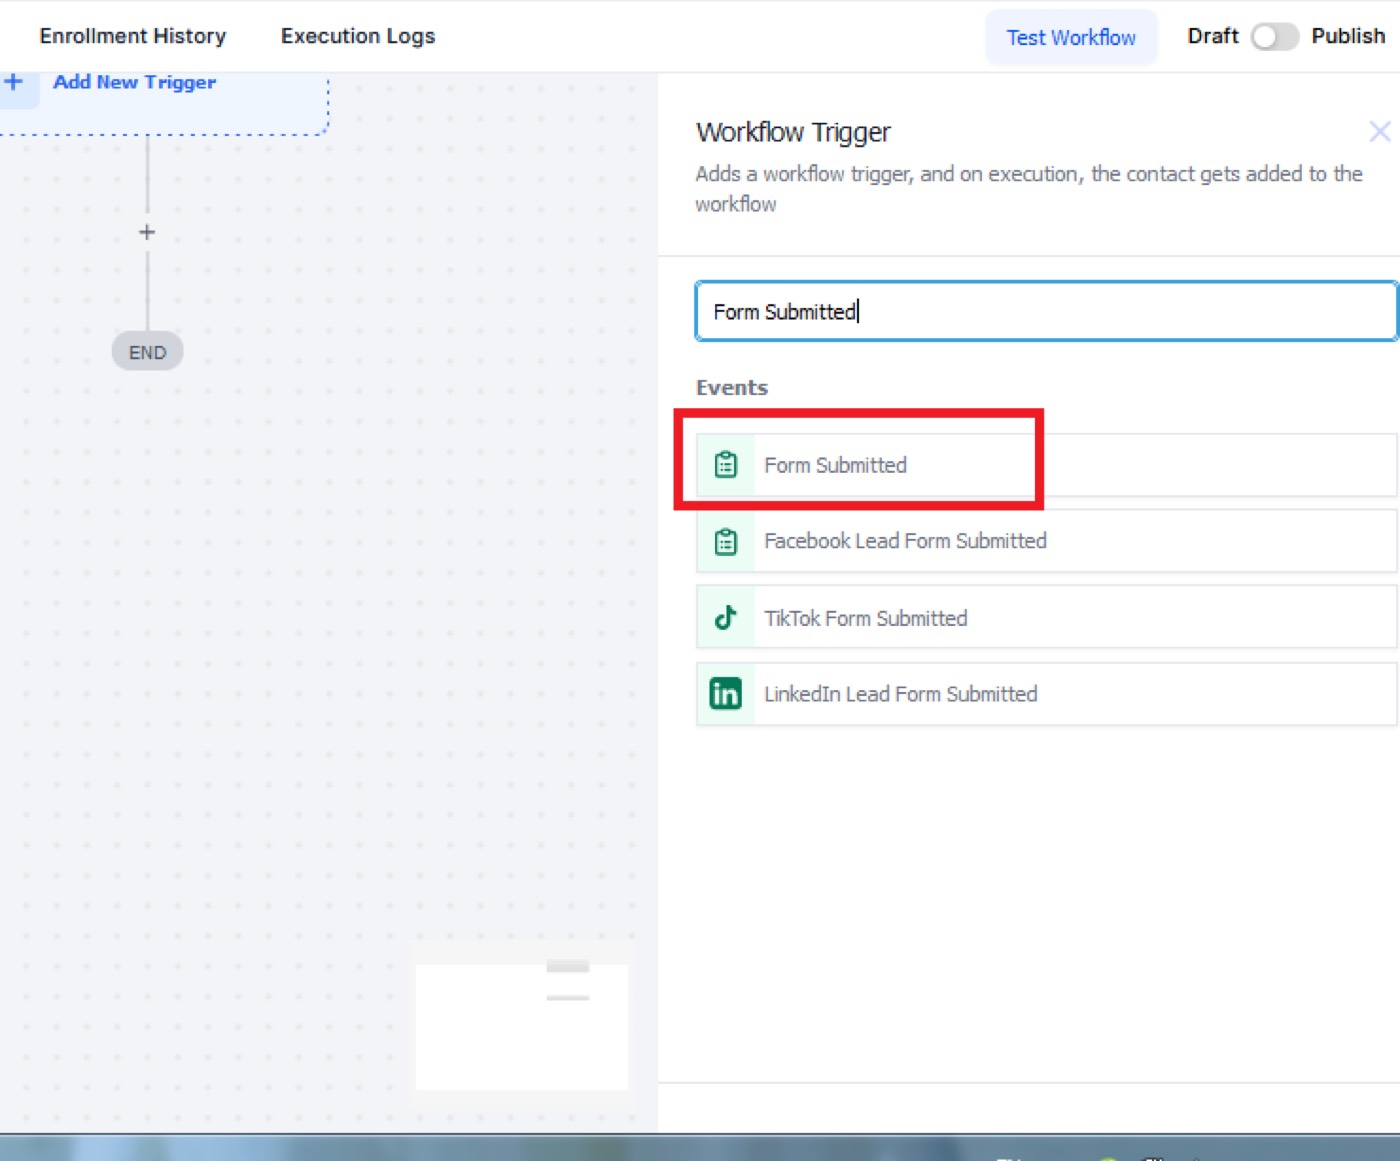
Let’s discuss several popular actions you can add to your trigger events. The first one is the ‘contact form submitted’ action. Here are the steps to add to your workflow.
Click on ‘Add new trigger’.
Search for ‘Form submitted’. Note that you may have 10 different websites and landing pages. This will trigger all of them. But if you want an automation for a specific form being submitted, that’s where you need to add filters.
Then select ‘form is’ and choose one of your specific forms. When that specific form is submitted with someone’s name, email, phone number, etc., it will trigger that automation.
Inside your “Trigger Actions’ you can add different actions such as send SMS or email then choose the contact, type the text message, save the trigger. At this stage you can use custom values.
Then you can add conditional branches including if/else statements, put a wait step and some other necessary steps. Make sure you put each action on 'Publish' mode and save them.
You can test your workflow by putting yourself as a contact. This way you’ll make sure your automation works properly and the way you wanted.
Customer Booked Appointment
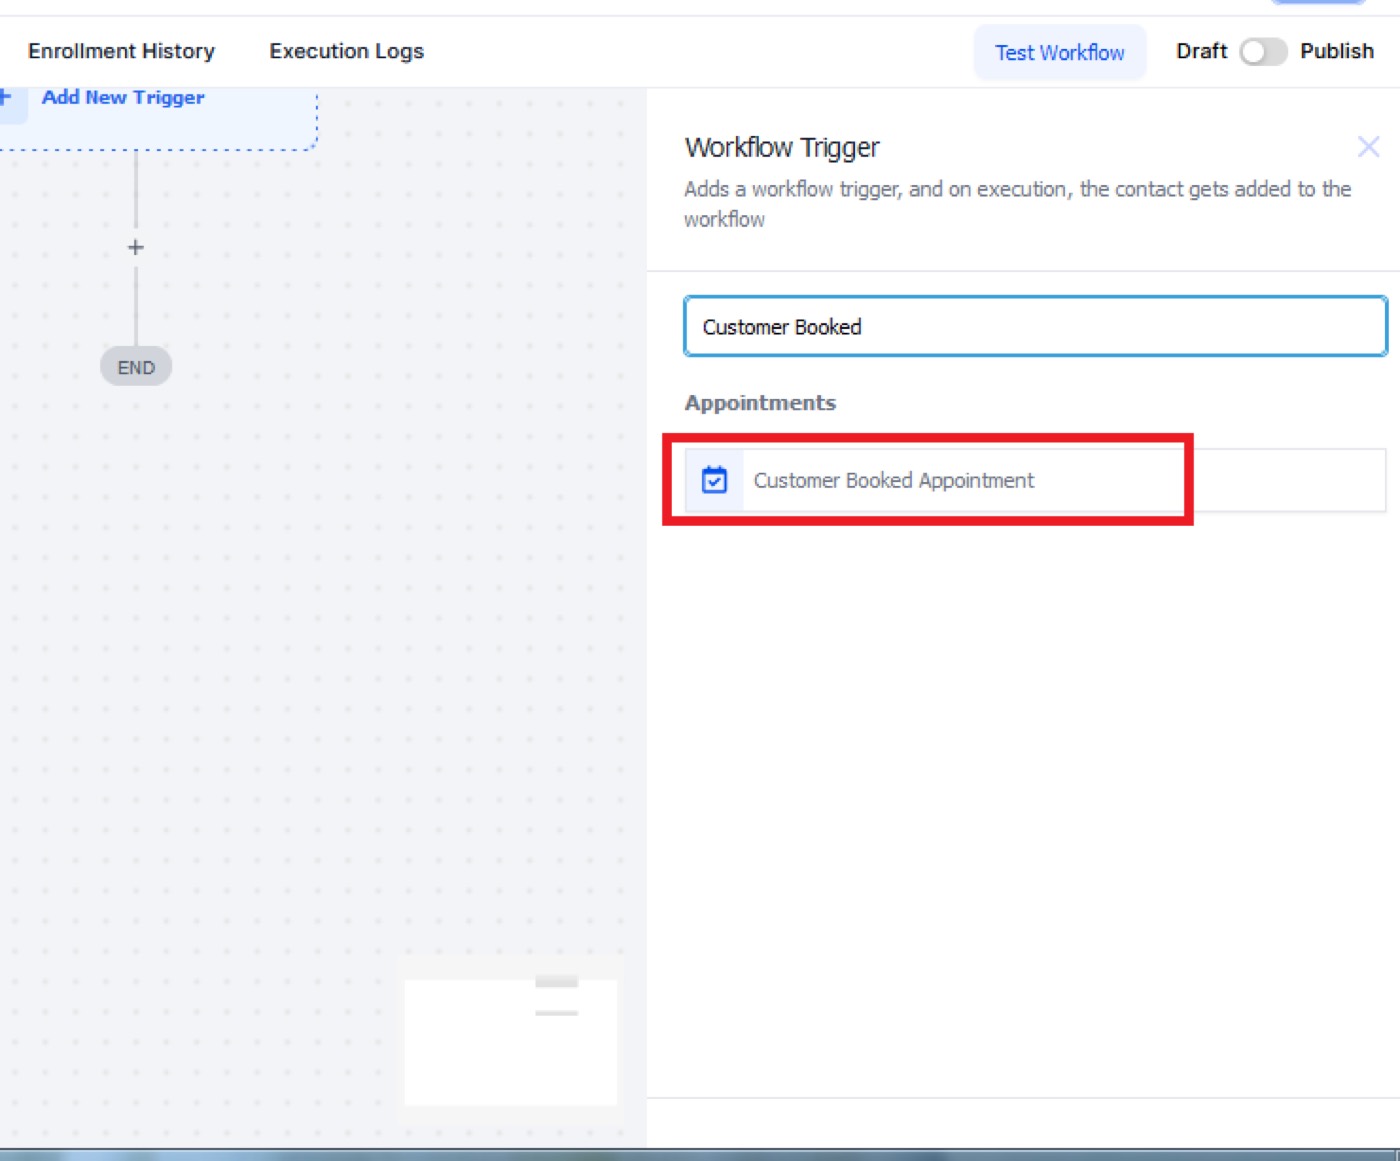
Another popular automation is appointment bookings. This trigger event is called customer booked appointment and you can find it inside trigger features.
Search for ‘Customer Booked Appointment’.
Go to ‘Appointment status’. It will allow you to specify which calendar the user has booked an appointment on.
Next, add a filter ‘Appointment status is’, “Confirmed’.
After this, select ‘In calendar’ and specify which calendar you want to be used.
Save the actions. Now whenever someone books an appointment on this specific calendar, this automation will trigger and fire off.
Next, set up email and SMS automations to send text messages. Use custom values, add a wait step to remind the customer about the appointment, etc.
Once you have your appointment trigger setup you can add a reminder automation to this workflow. When the user books an appointment, you’ll automatically send them a reminder message that the appointment is, for example, in 1 hour. It’s another wait step. Put ‘1 hour before’ for this trigger. That’s how you make an appointment confirmation and reminder workflow.
Sending a Review Request
When the client uses your services, you can ask them for a review request. Thus as a next step in your workflow automation, you can add another ‘Wait’ step of ‘1 hour (or 24 hours) after appointment’. Here you can send a review request to your client asking them to evaluate your service. The system will send them a link to your google business suite where they can leave their review.
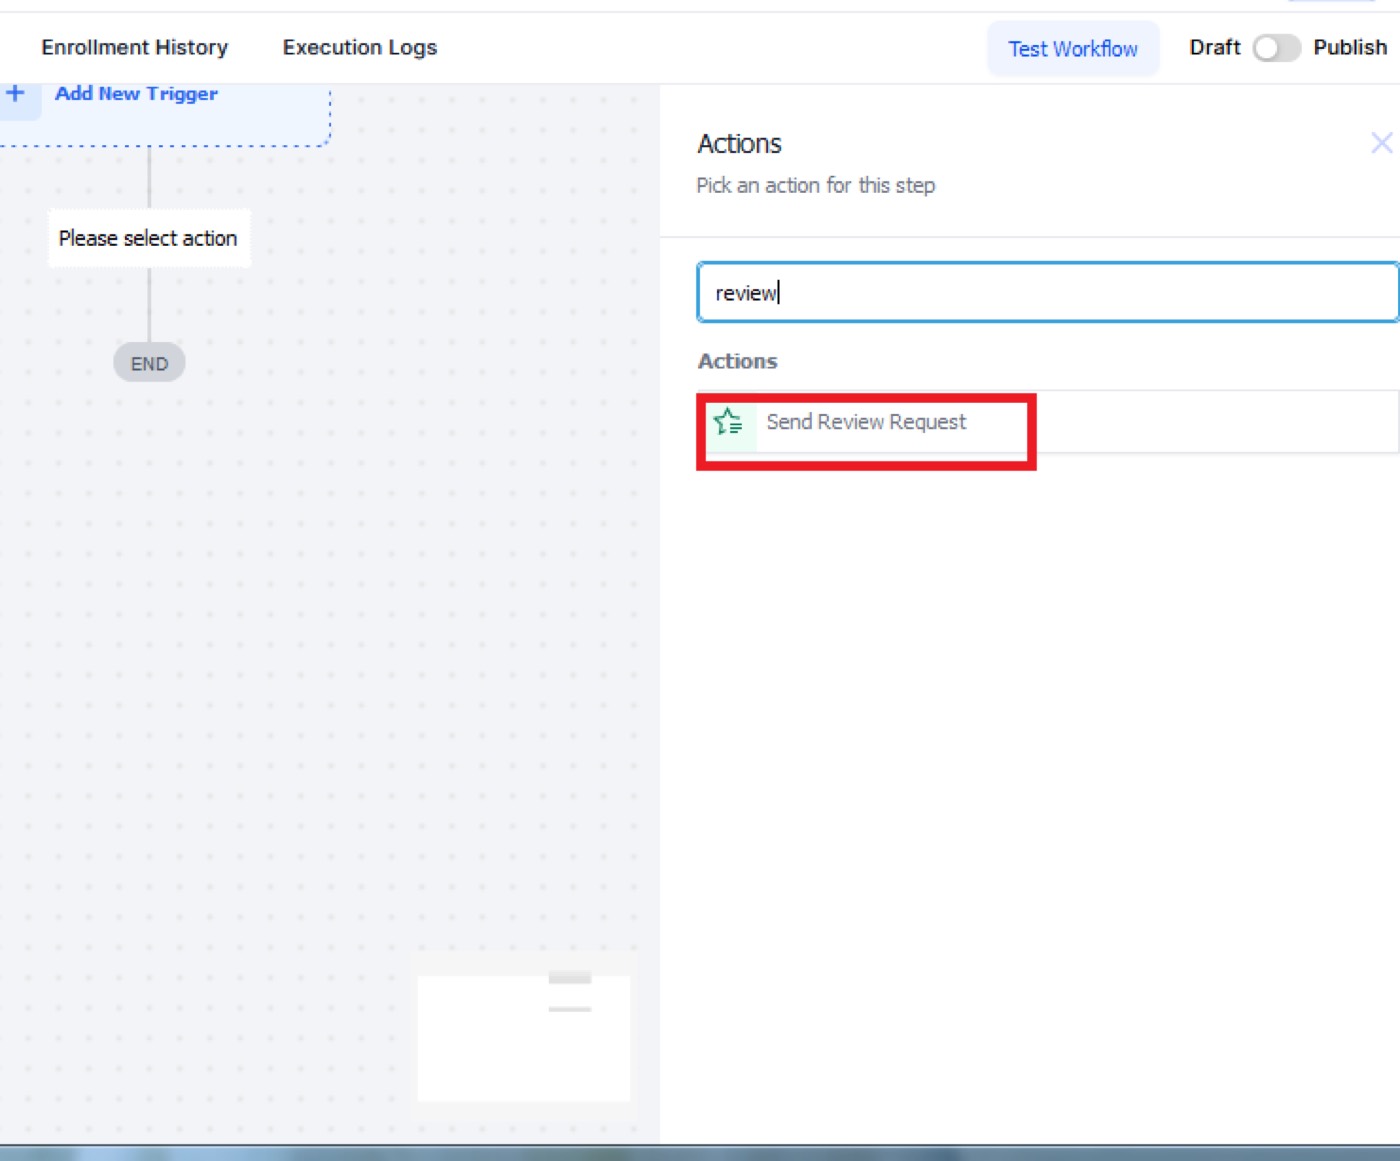
You can choose to send it either by email or SMS. Then save the action. You can test this and customize under the reputation management tab in your Automatescale account. This is perhaps the best way to do google reviews automatically. Of course you can send google review requests manually, but this is one of the other ways to automate a google review request.
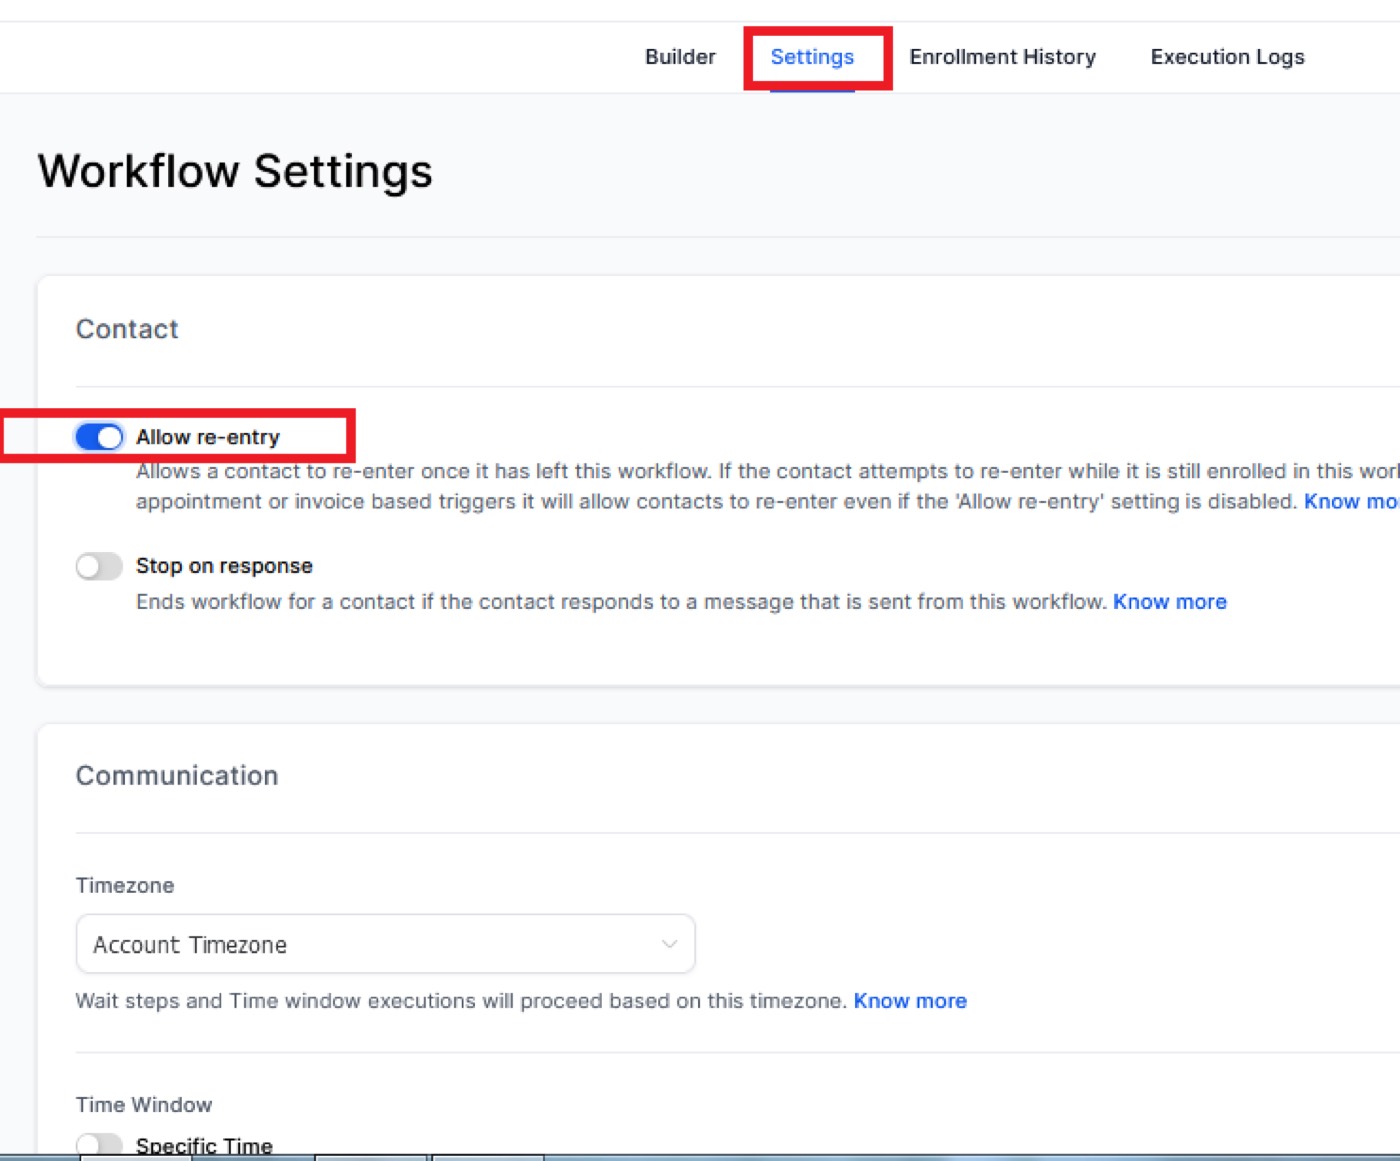
Sometimes a customer may book multiple appointments. To make the system send review requests every time your client books an appointment, you need to go to workflow settings and click on ‘allow re-entry’. This way they’ll receive review requests each time they book a specific appointment.
Checkout
When someone checks out and purchases something from you on your websites, you can offer a cart to make things easier and more convenient for the user to buy your products. This is the next good automation idea to add to your workflow and here is how to do it.
Search for ‘Order Form Submitted’ inside your trigger features.
Then select a website/funnel to specify which website or funnel you have for that checkout form. Save the trigger.
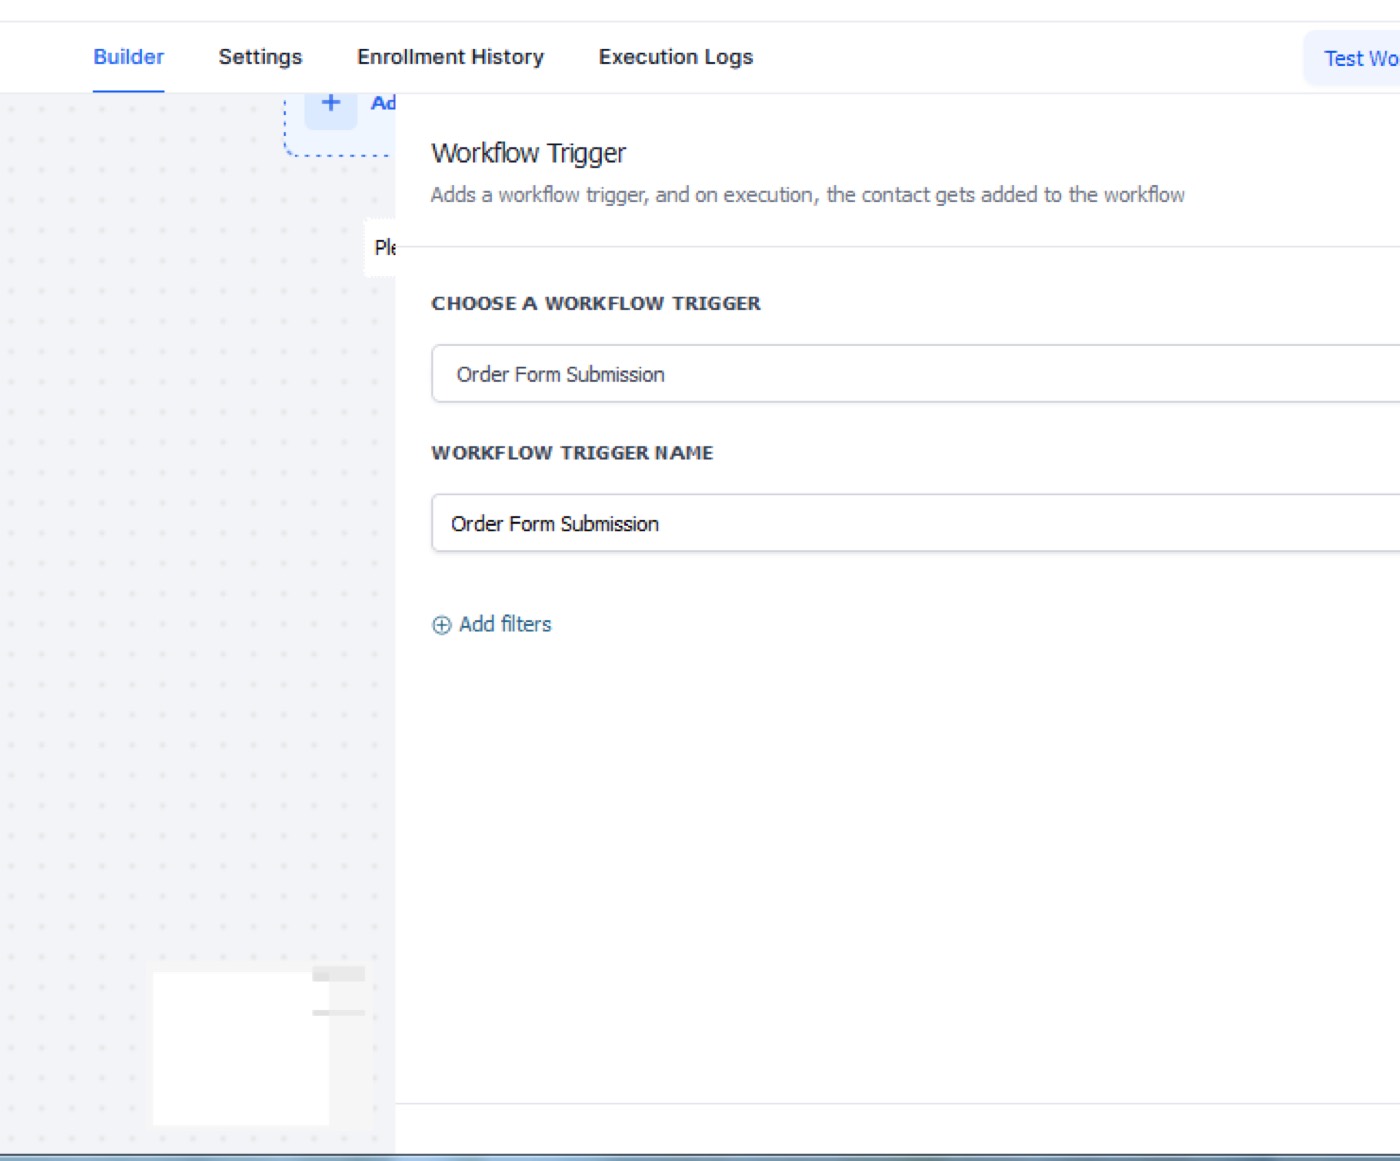
Note, anytime someone purchases your products or services you are selling on your websites or funnels, you can specify which funnel or website you want to be used, because you may have multiple websites or funnels. For this, you need to go to filters and send the customer a text message to inform them that their order has been placed.
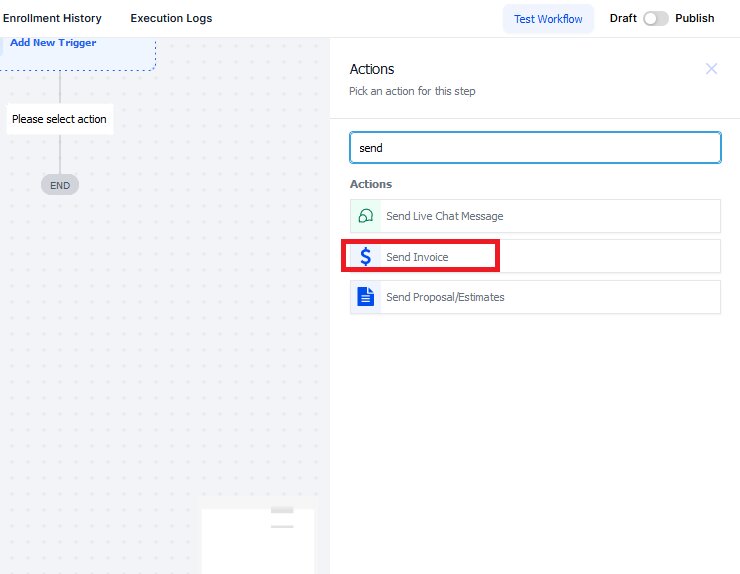
Then you can add another trigger to send them an invoice. Search for ‘Send invoice’ in trigger actions, make the necessary changes and save the action.
Next, create a trigger to send them what you have promised. For instance, if it’s a course search for ‘Membership grant offer’ inside trigger features. Click on it and select from your courses. Check the specific course, save the action and the system will automatically send them an email with their username and password to log into the course.
Facebook Lead Form
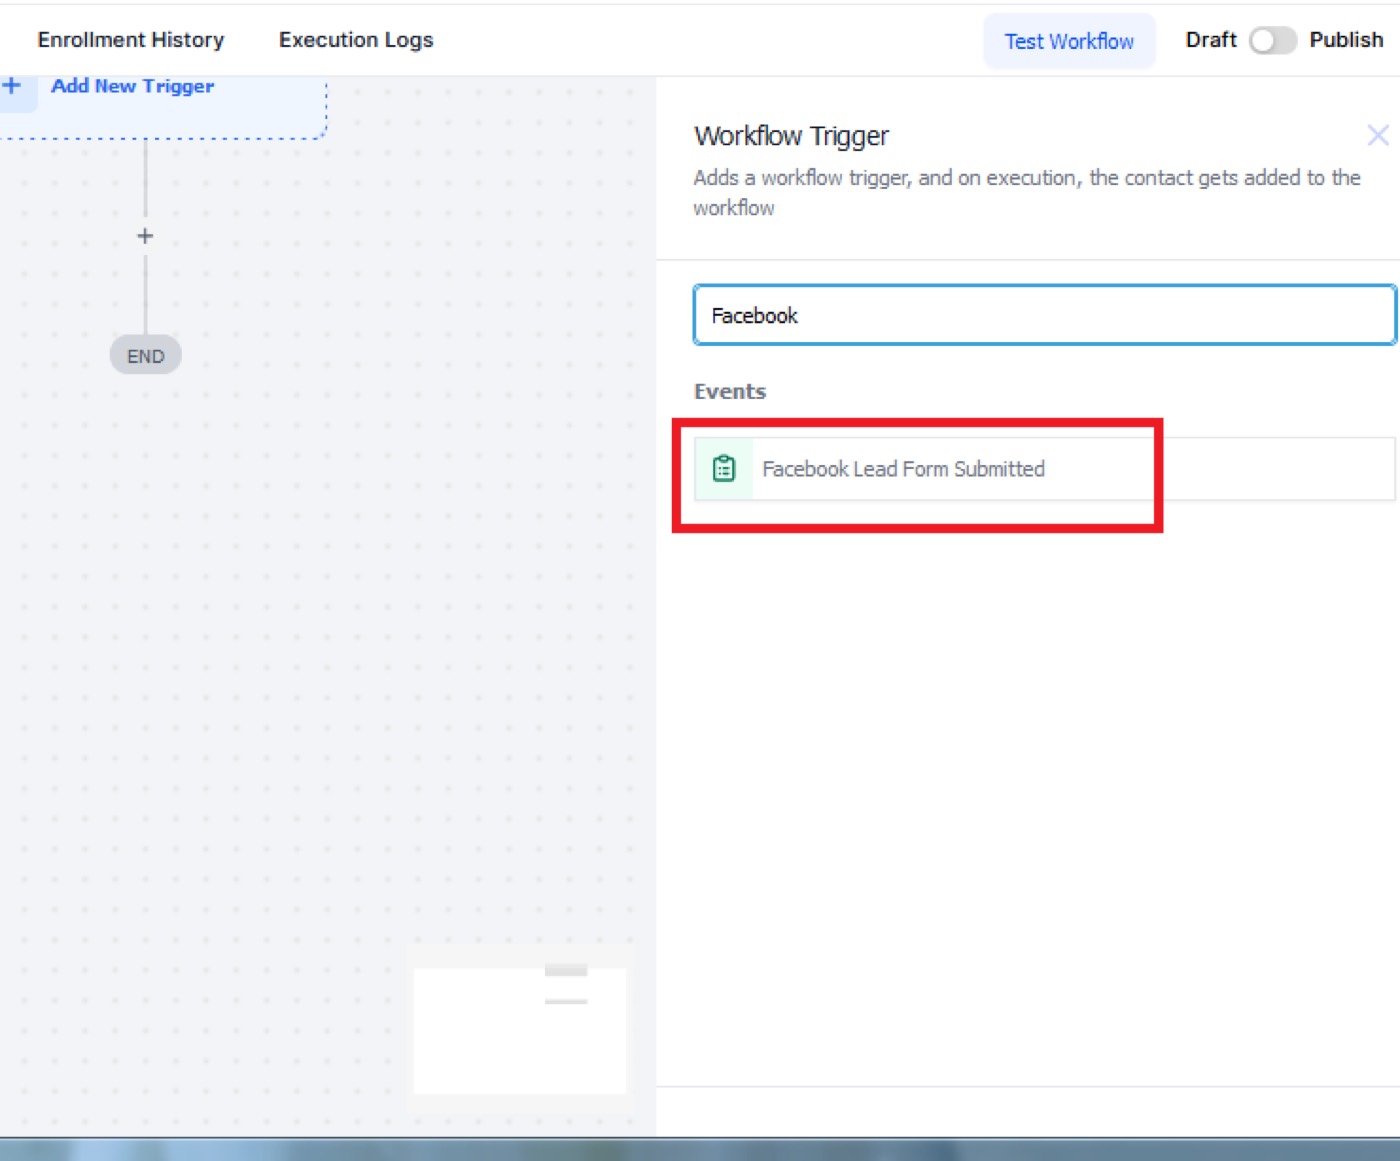
If you are running Facebook lead ads and you want to trigger follow-up text emails, voicemails when someone fills out the form on Facebook ad, here is how to do that with Automatescale.
Click on 'add trigger', type in ‘Facebook lead form submitted’ on your trigger features.
Click on ‘Add filter’. Here you can first integrate your Facebook account. Add ‘In form’ and select the account. Save the action. This way you connect and integrate your Facebook account.
Then you can choose to send users SMS, email, voicemail, etc.
Next, you can add a wait step, if/else statements with different branches, conditions with segments and any other features you find necessary for this automation. You can do all of these the same way as you do with the previous automations.
Trigger Links
You can have different links in emails that you send out to your users. They are called trigger links. Here is how to set up a trigger link.
Go back to your account page and click on the ‘Marketing’ tab.
Here you see ‘Trigger links’ on the top of the page. Click on it. Add a new link.
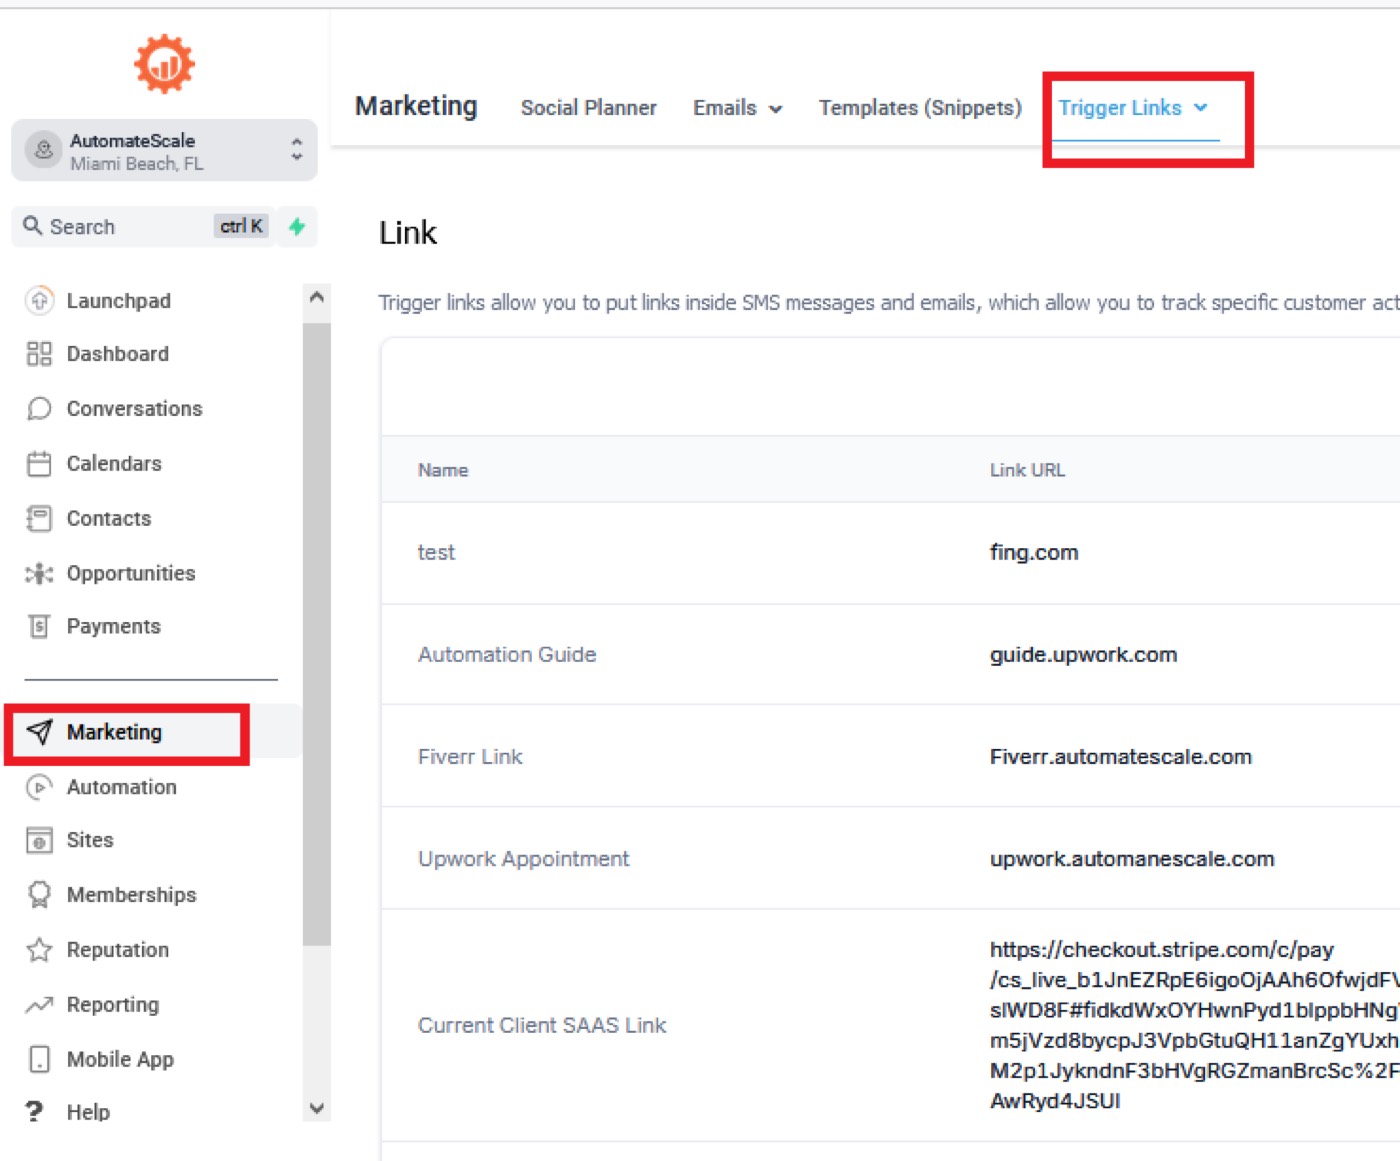
Name the trigger link. Type or put the link URL. Click on ‘Save’.
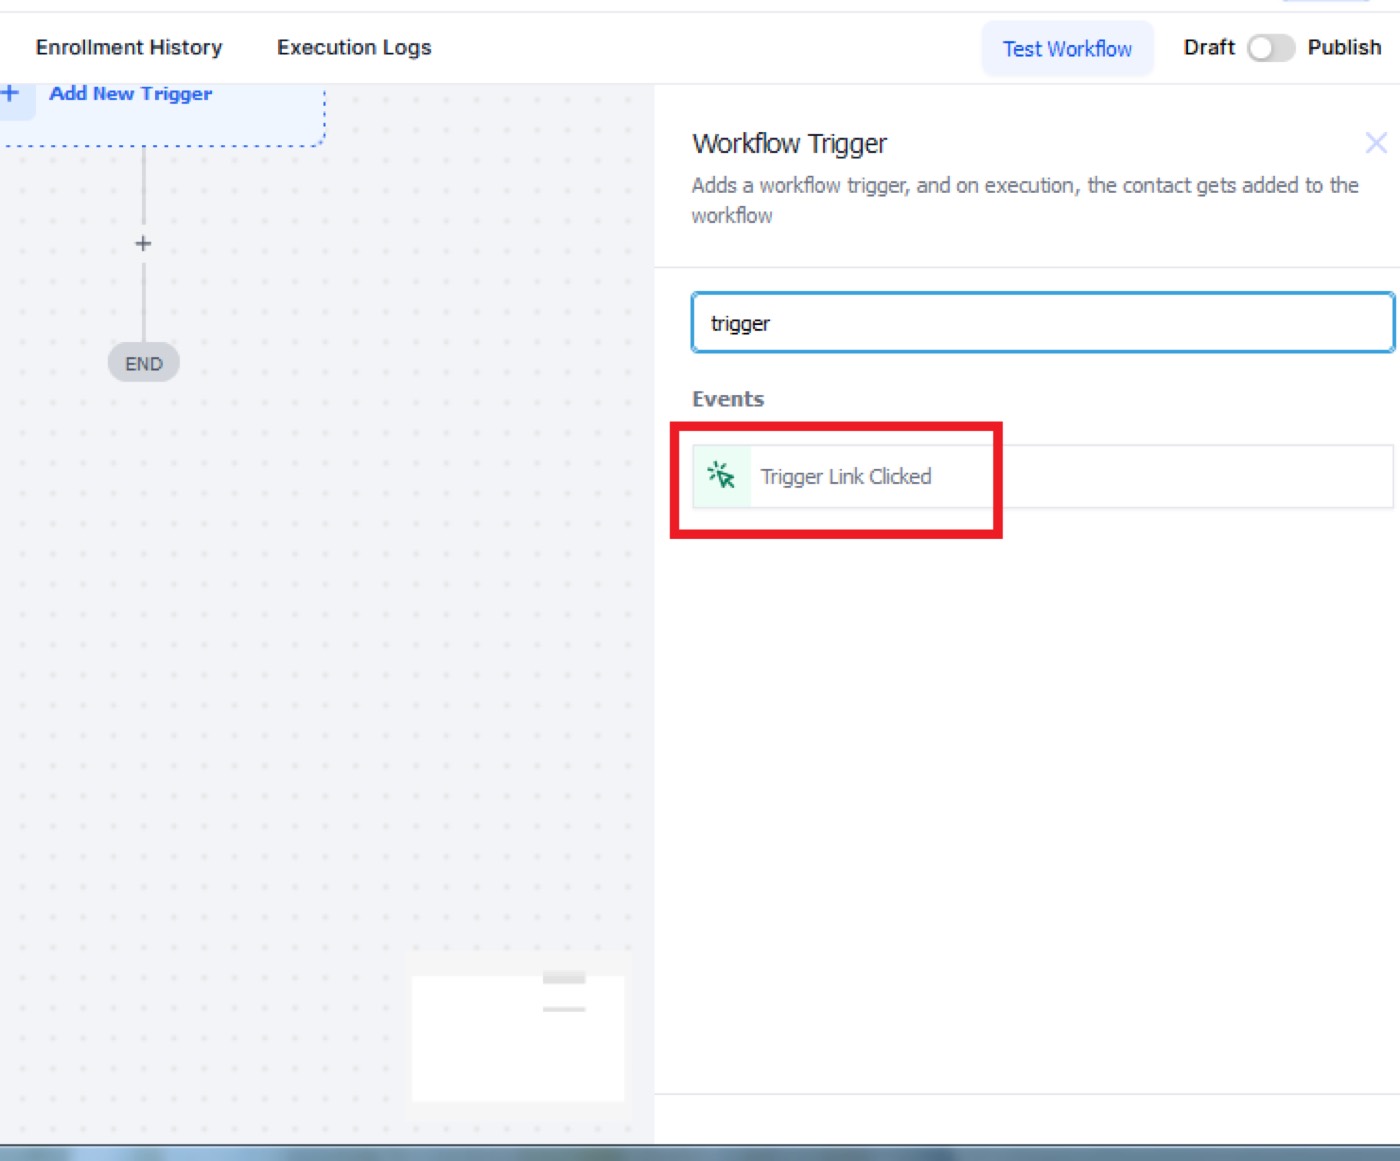
Go to ‘Automation’, 'Workflows'. Click ‘Add New Trigger’ inside the workflow. Search for ‘Trigger link clicked’. Add a filter ‘Trigger link’ and select the website.
Now, if someone clicks on that trigger link you can then hit them up with whatever you want; SMS, email, etc to start a communication with them and interact with them. Therefore, add SMS and email actions as your next steps at this stage.
Note, that you need to have your users’ information (name, email address, etc.) as a lead in the system for this to work. It won’t work if a random person that you haven’t captured as a lead, clicks any sort of trigger link because you don’t have their phone or email.
Update Opportunities
Some other valuable features that you can use in your automations are create/update opportunities. When you add it to your automation workflow it automatically moves a lead to a specific stage in your pipeline.
You can find this feature under the ‘Opportunities’ tab. Inside this tab you’ll find ‘Pipeline’. One of the most important stages in your pipeline is that when the customer books an appointment, you can add them to the stage when you can automatically move them from a new lead stage to the appointment booked stage.
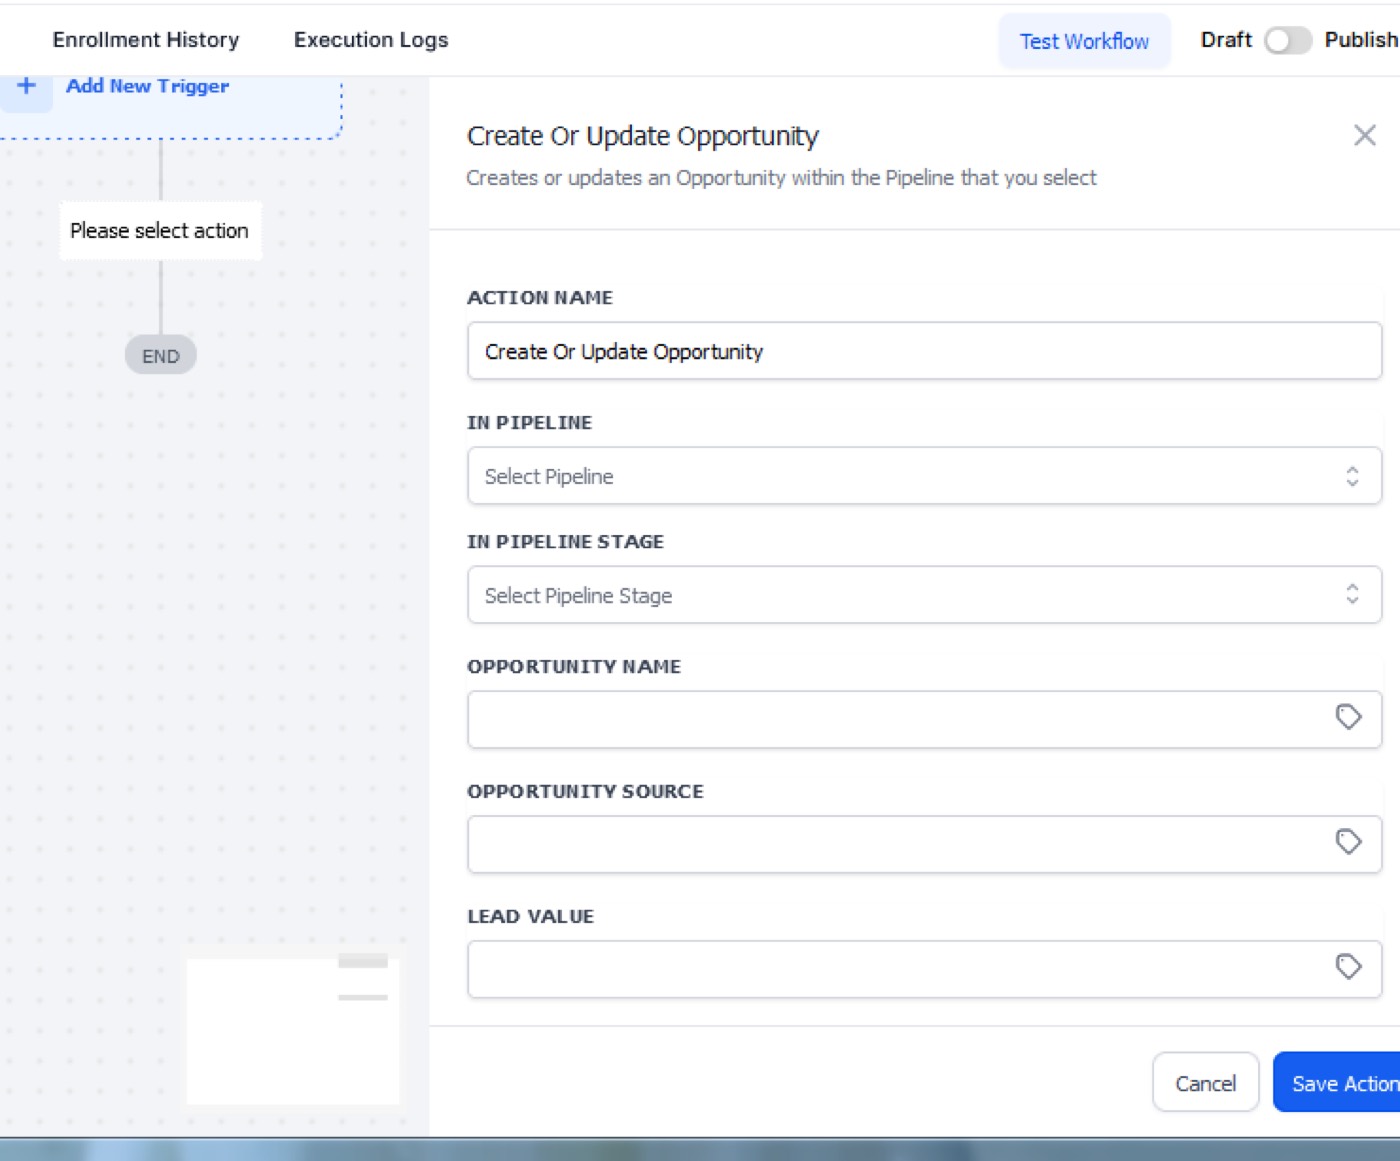
Another great trigger feature inside update opportunities is the ‘Internal notification’. You can add it to your automation if you want to be notified about a new appointment booking when someone books an appointment.
Summing Up
we have come to the conclusion that it's quite easy to master Automatescale's automation and understand how it works for your online business. some of the most popular features discussed in this article will give you an idea on how to build a productive and outstanding automations without a hassle. if you haven't signed up fr Automatescale, you can do that right now!
★ Want this built for you? AutomateScale deploys the AI agent layer, funnels, and automations behind this — for agencies, SaaS founders, and coaches. Apply for a strategy call or subscribe to The Scale Brief.