Introduction:
Today’s guide is devoted to Automatescale workflow automation where you’ll learn the best tips and tricks on how to use workflow automation inside your Automatescale account. So, stay tuned and let’s get started.
What is Automation
First, let’s clear it out for you what automation is. Automation is where we are going to store the workflows. We refer to it as anything that is a customer or personal action inside the system. This feature has the ability to automate many processes directly from the platform.
When you create workflows you get the opportunity to automate lead nurturing and communication, take appointment bookings, manage calendars and pipelines, etc. Automate lead nurturing can be held via email, voicemail, SMS, FB Messenger, and more.
Workflow Automation
Now, as you know what automation allows you to do inside your account you may need to create an account in Automatescale to use this powerful CRM feature. It’s easy, quick and simple. If you already have an account, then here are the further steps you need to take to get acquainted with workflow automation.
Go to your Automatescale account.
Click on ‘Automation’ on the left side of the page.
Click on ‘Workflows’. Here you see a workflow list including numbers, list view, filters, and the opportunity to create folders and workflows.
Create a Folder
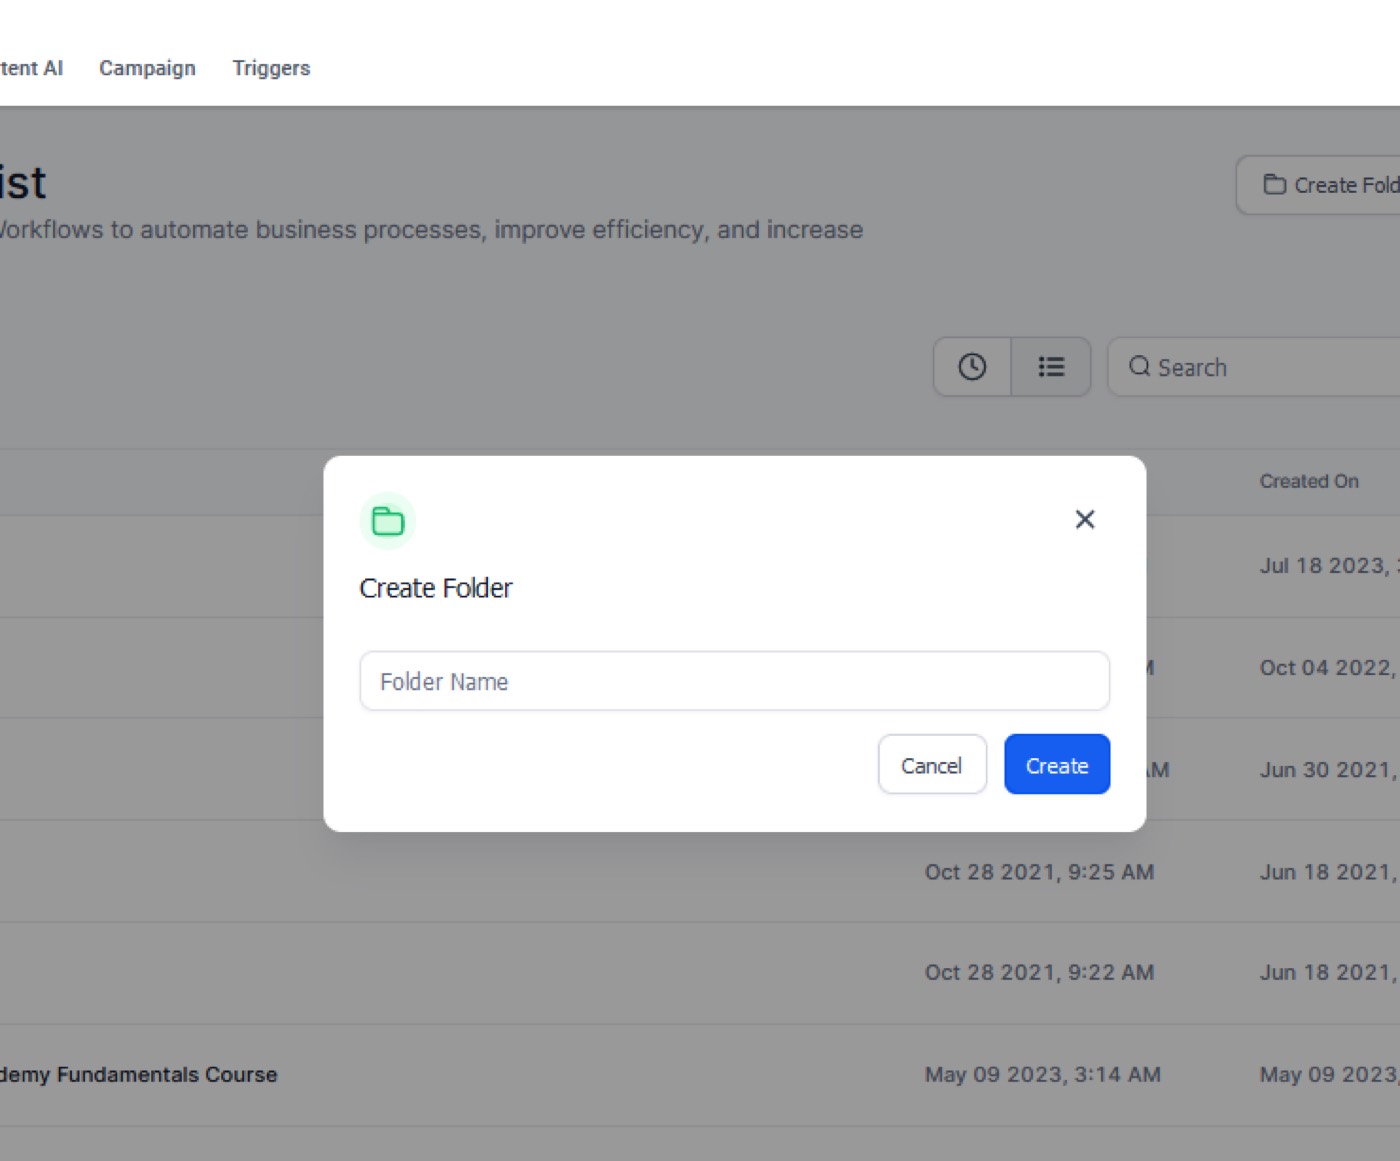
Click on ‘Create Folder’. Name the folder. Let’s name it for instance ‘Appointment reminders’ and work on its automation. Now click on ‘Create’ and you’ll have it in your ‘Workflow list’.
Click on the created folder on the ‘Workflow list’. It’s more convenient to create a workflow inside this folder.
Create a Workflow
Helpful Features Inside the Workflow
On the top left of the page you see ‘Actions’. Click on it and you’ll see ‘Show Version History’.
Below the ‘Actions’ you see zoom and zoom out. You’ll need to use this feature in case you build really big automation with different branches.
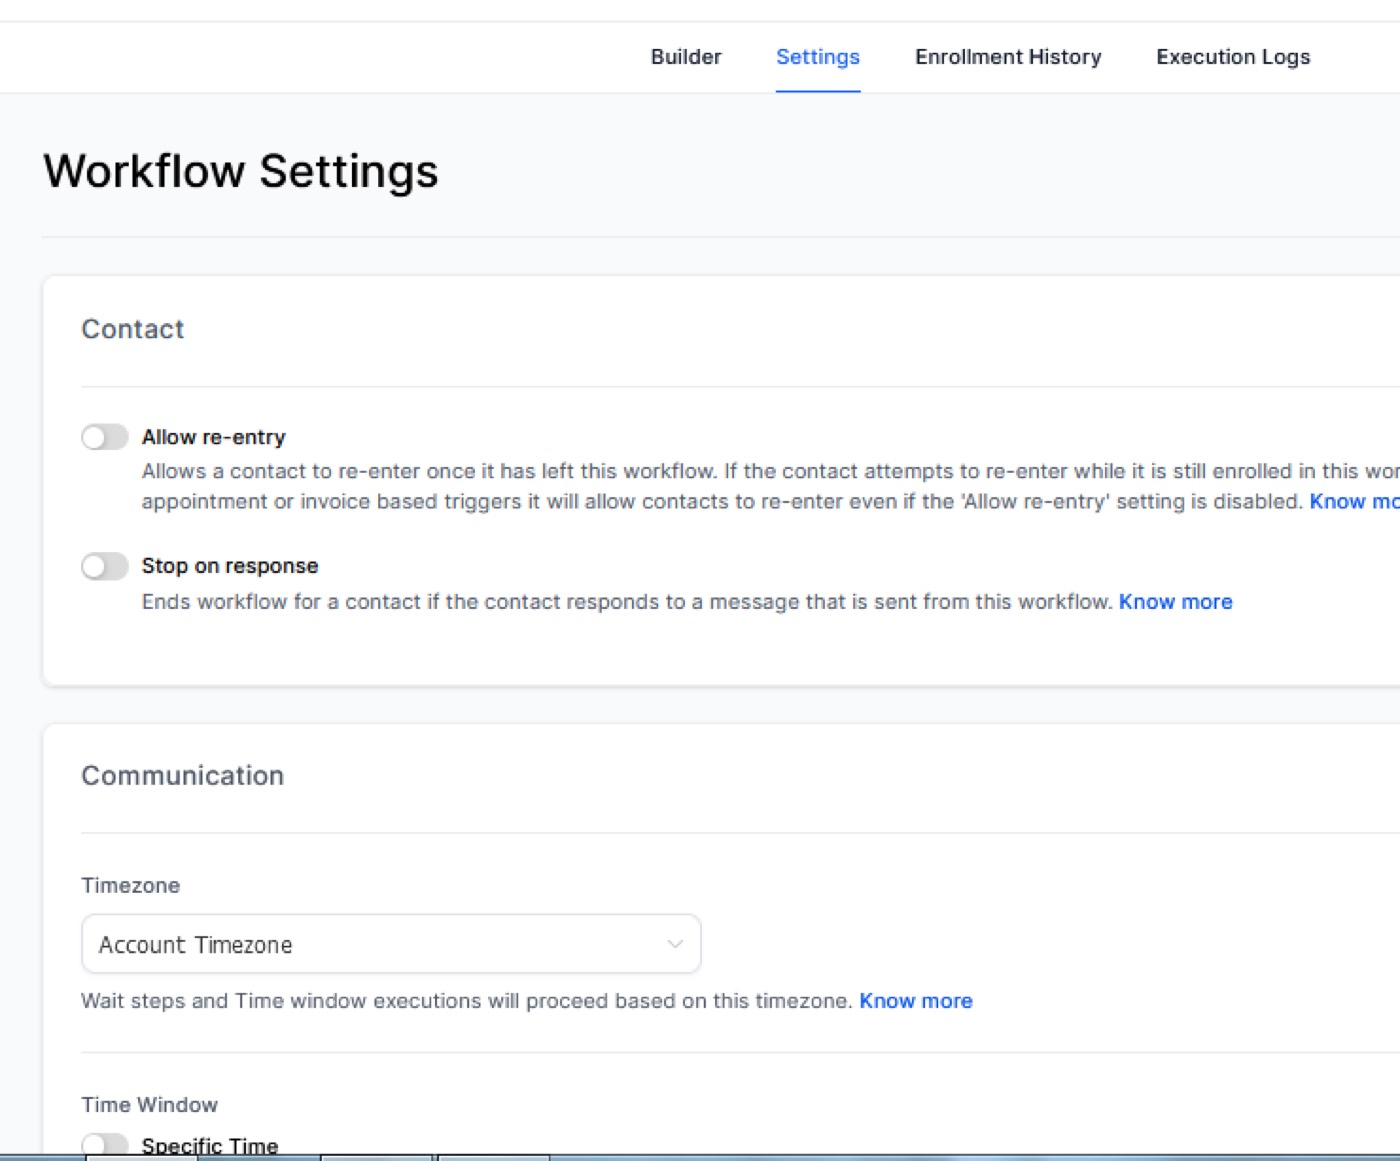
In the middle of the page you see 4 features; Actions, Settings, History, Status. Actions show the main screen where we see all the steps, branches and actions. Settings allows you to make changes for the overall workflow. You can set your name, email address, date and time, and manage conversations. History allows you to check and see where the steps of the automation might have failed or when you need to do troubleshooting in case someone didn’t get a reminder.
Status shows if you are running some kind of weight or a long sequence.
On the top right of the page we have Save, Test workflow, Draft, and Publish.
This much about the features found inside the workflow. Now, let’s create a workflow from scratch.
Click on ‘Create Workflow’.
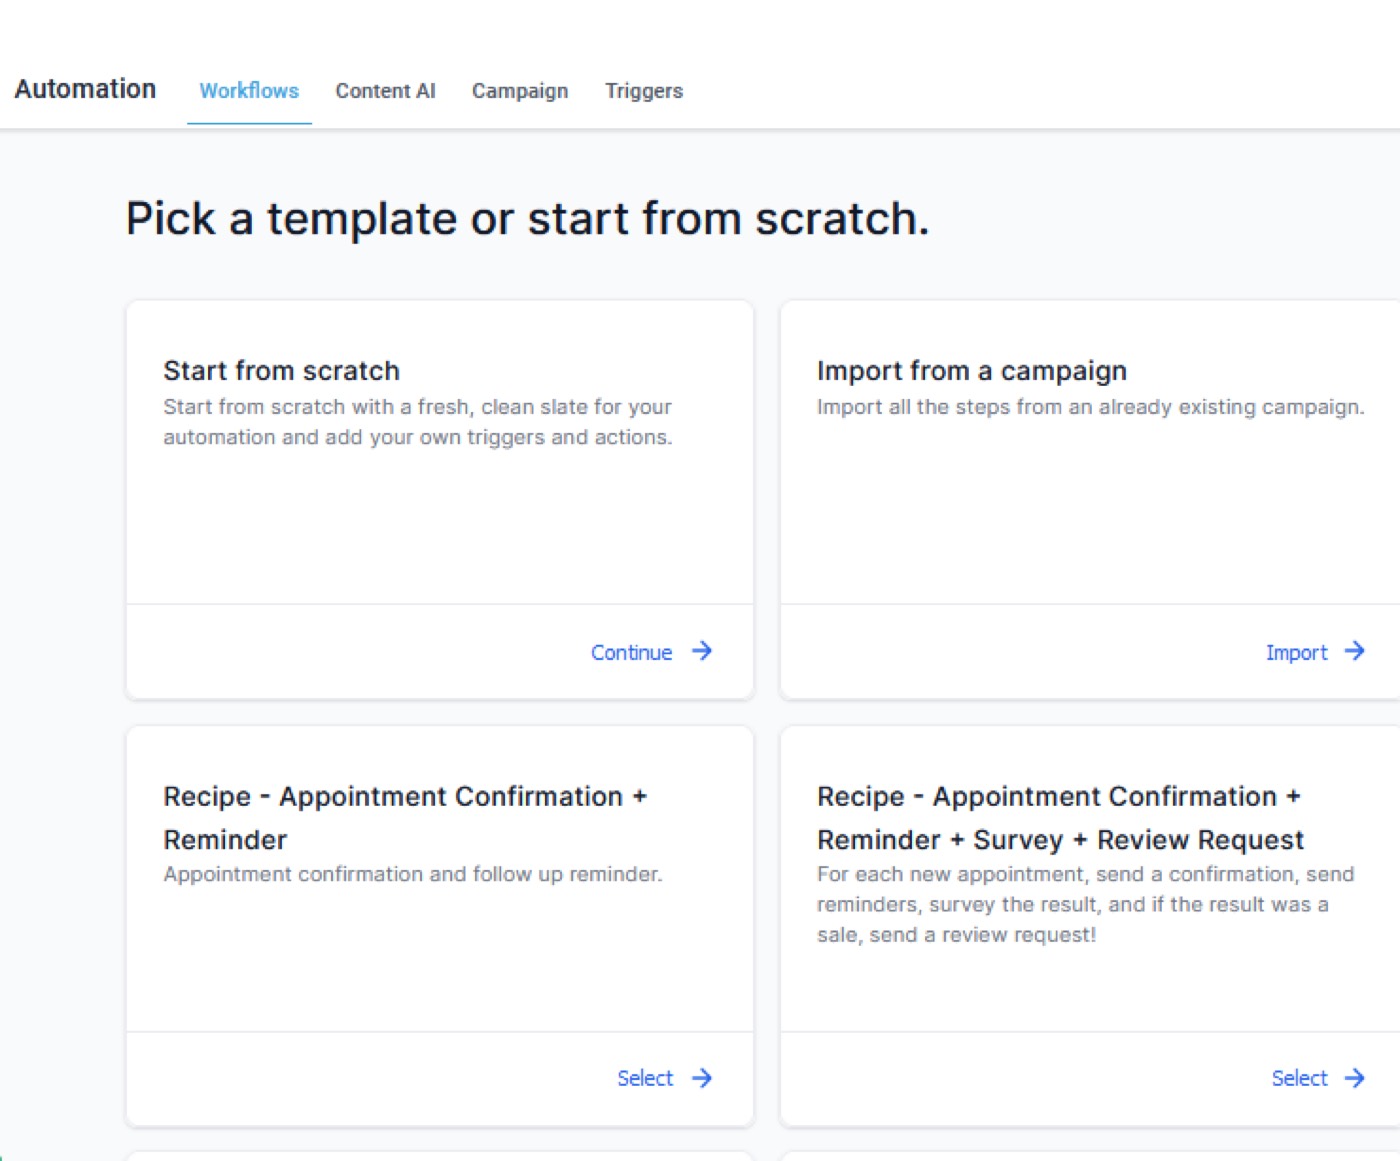
You have templates to choose from. To start creating the workflow from scratch, click on ‘continue’ on the ‘start from scratch’ template.
First, name the workflow on the very top of the page. Since we are working on an appointment reminder, let’s name it ‘1.General Appointment Reminders’.
Click on ‘Save’ on the right side of the page.
Create Triggers
Next, we can work on triggers. Triggers are conditional states that say “If X happens, do Y.” This is a great bunch of features to keep your appointments well-organized.
Trigger Features
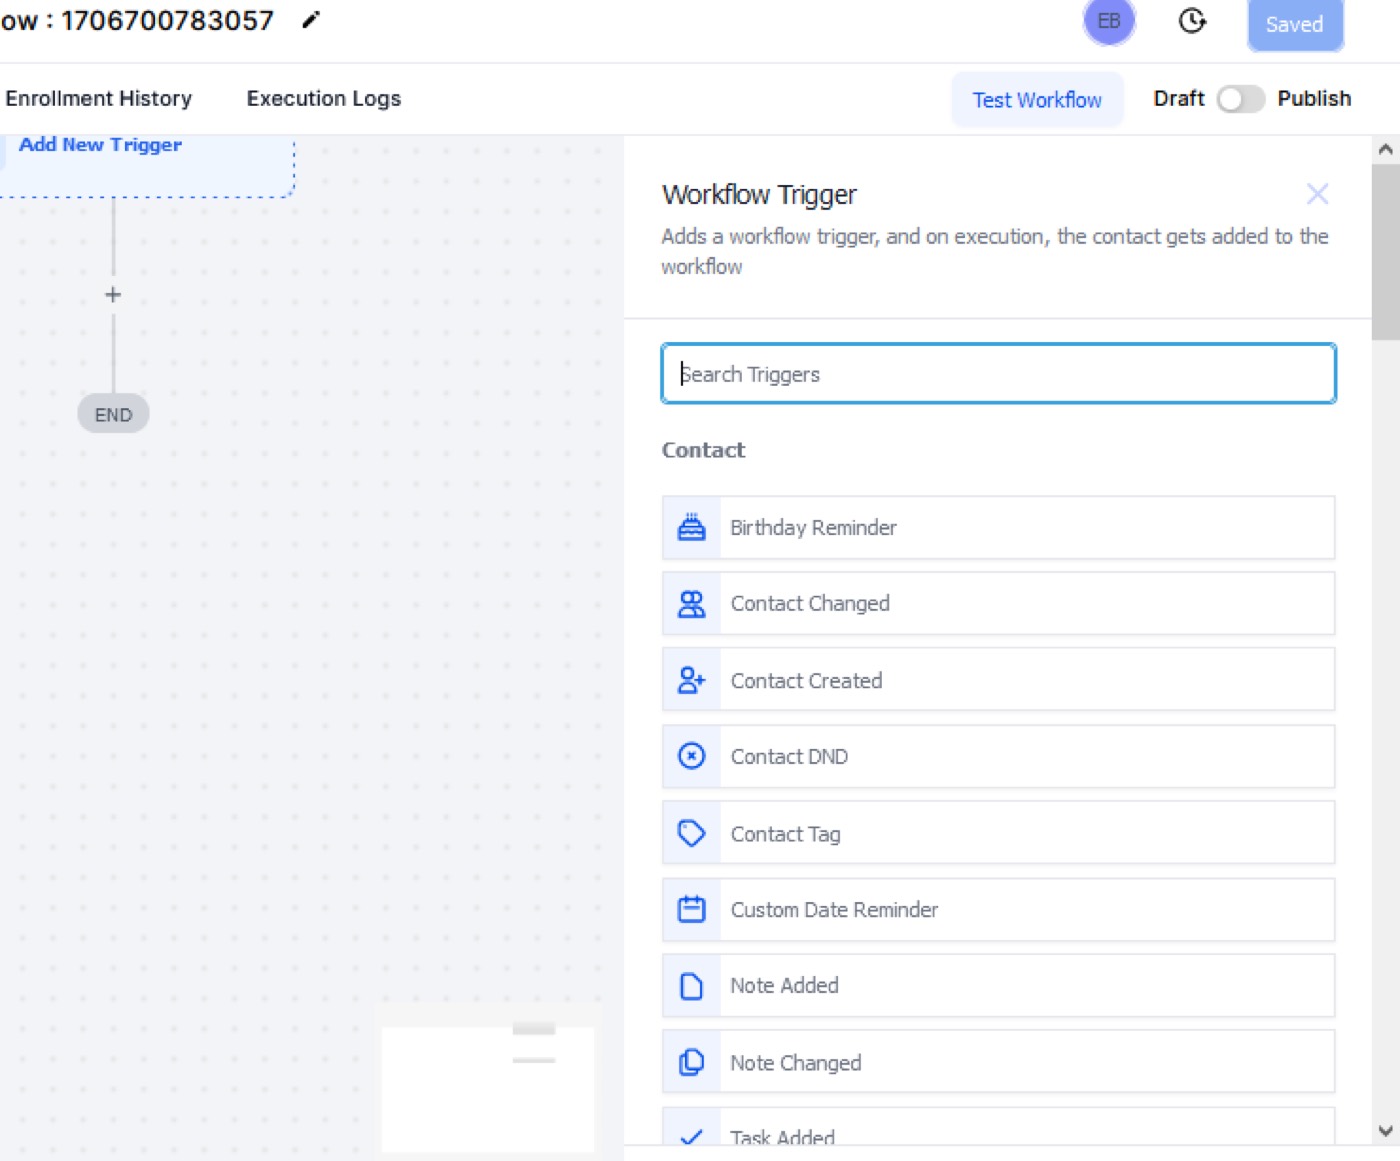
Inside the ‘Actions’ click on ‘Add new workflow trigger’. A window with trigger features appears on the right side of the page.
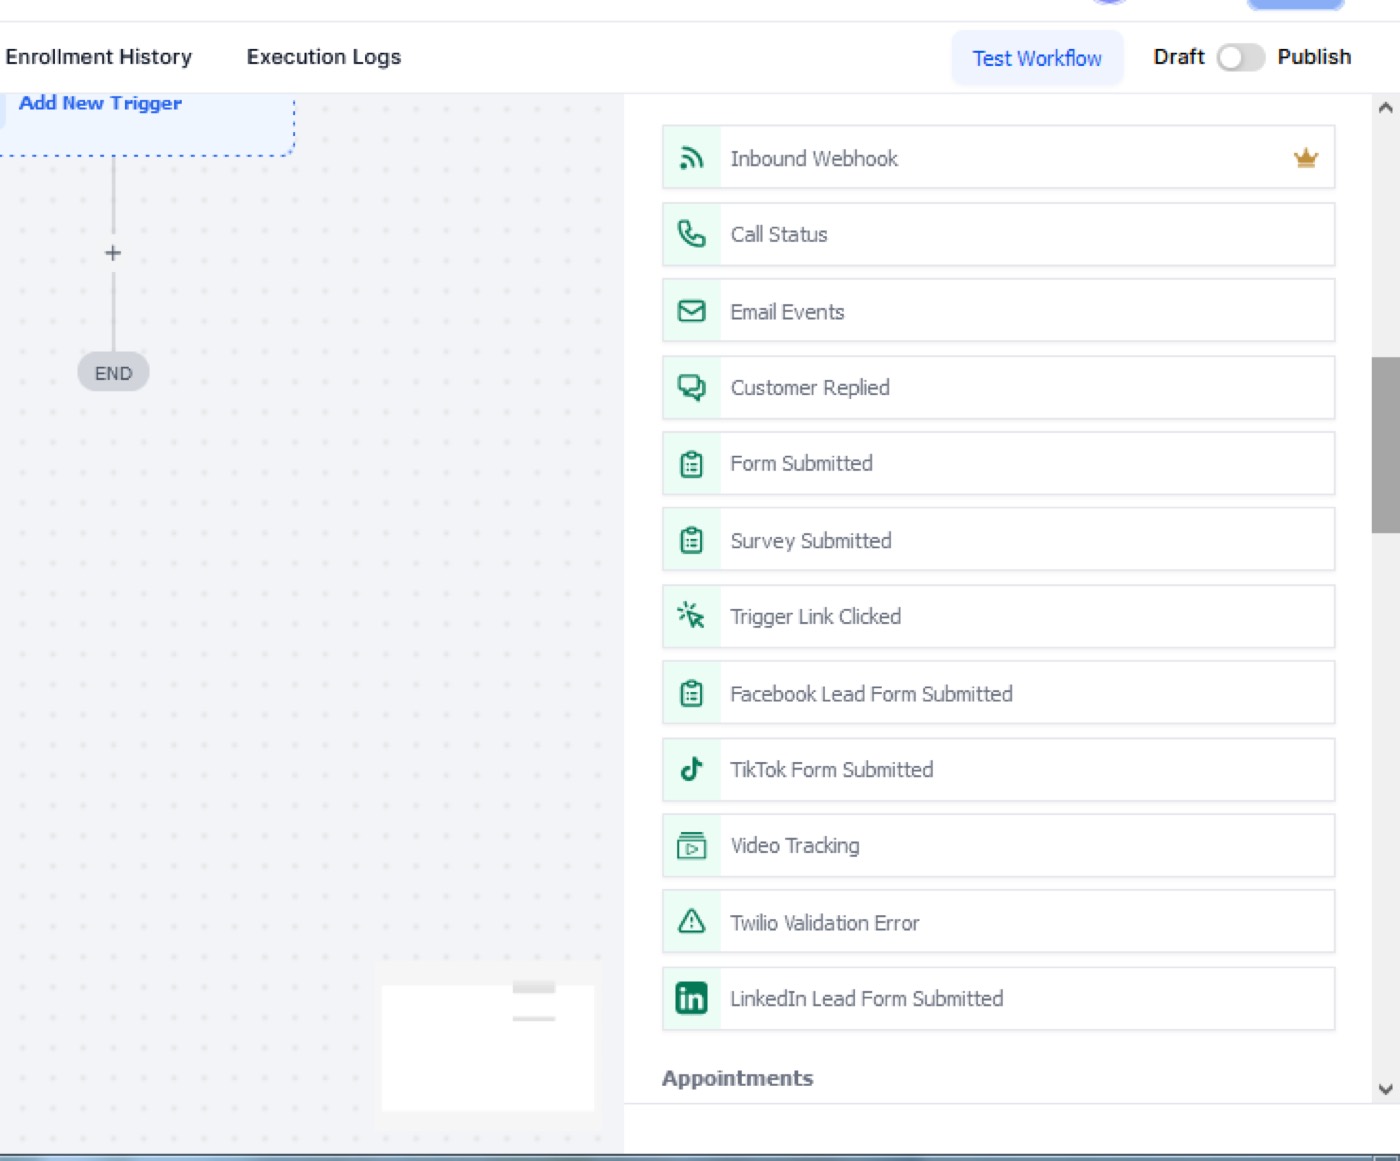
Inbound Weebhook
a powerful feature that makes it easier to automatically transfer data from external systems to your CRM.
Affiliate Created
allows to manage affiliates efficiently such as adding contacts to the affiliates list, updating contact status, and adding or removing them from a campaign.
Appointment
here we have ‘appointment status’ and ‘customer booked appointment’. They show the appointment status and allow you to check rescheduled appointments.
Contacts
here you see a number of other features such as Birthday Reminder, Contact Changed, Contact Created, etc. They allow you to trigger off someone’s day whenever a detail is changed inside of a contact, email, birthday date, anniversary date, membership date, status, and the like.
Inside ‘Notes’ you can add notes or change them.
You can add a task or set a task reminder inside ‘Task’ features.
Contact Actions
‘Customer replied’ shows which channels the customer has sent a reply (Facebook, SMS, Instragram).
Then you can use ‘Form submitted’ to see lead magnetic forms, sign ups for webinars, a registration and more.
‘Order Form Submission’ is used to trigger when somebody buys your product when you put the order form inside of a funnel.
‘Survey Submitted’ is the action where the customer fills out a survey.
‘Trigger Link Clicked’ is used to trigger an action every time the link is clicked.
‘Twilio Validation Error’ tracks errors about text messages.
Events
‘Call Status’ shows incoming busy, no answer statuses for calls.
‘Email Events’ will activate when an email is sent or received.
Inside this feature we have ‘Facebook Lead Form Submitted’ that activates when a lead form gets submitted to Facebook.
Membership
‘Category Started’ and ‘Category Completed’ show when a contact starts and finishes a memberships’ category.
Then we have ‘Lesson Started’ and ‘Lesson Completed’ to check the status of the lessons.
‘Membership New Signup’ shows when a new user registers for a membership.
‘Offer Access Granted’ and ‘Offer Access Removed’ show when a user has access to or is removed from the membership.
The same way works ‘Product Access Granted’ and ‘Product Access Removed’ when a user is granted an access or removed from accessing the membership.
‘Product Completed’ activates when the user finishes a product in a membership.
‘User Login’ activates when a user signs in.
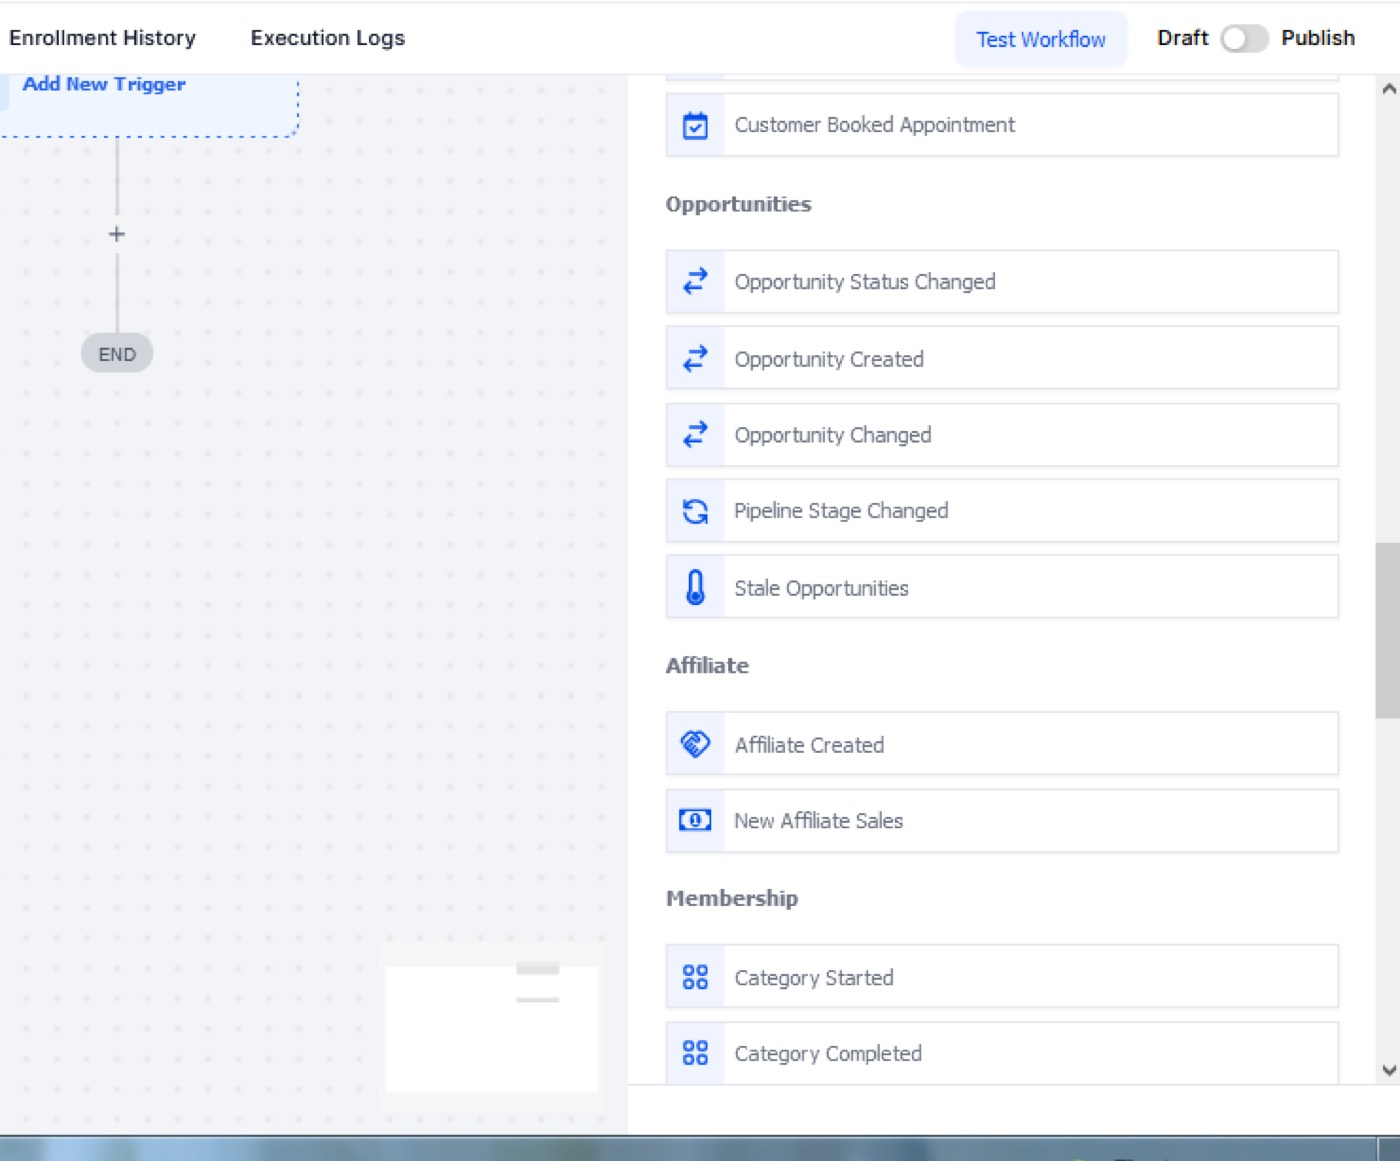
Opportunities
‘Opportunity Status Changed’ activates when the status of an opportunity is changed.
‘Pipeline stage changed’ occurs when the pipeline stage of an opportunity gets changed.
‘Stale opportunities’ occur when an opportunity has not been updated for a long time.
Payments
‘Invoice’ activates when a new invoice is created.
Shopify
‘Abandoned checkout’ activates when a checkout becomes abandoned by a client in Shopify.
‘Order placed’ occurs when an order is placed in Shopify.
‘Order fulfilled’ occurs when an order is fulfilled in Shopify.
Media
‘Video tracking’ activates when a video gets tracked.
TikTok
‘TikTok form submitted’ activates when a form is submitted on TikTok.
There are some other features that can be used when creating triggers, but the above-mentioned features are the most popular and useful ones.
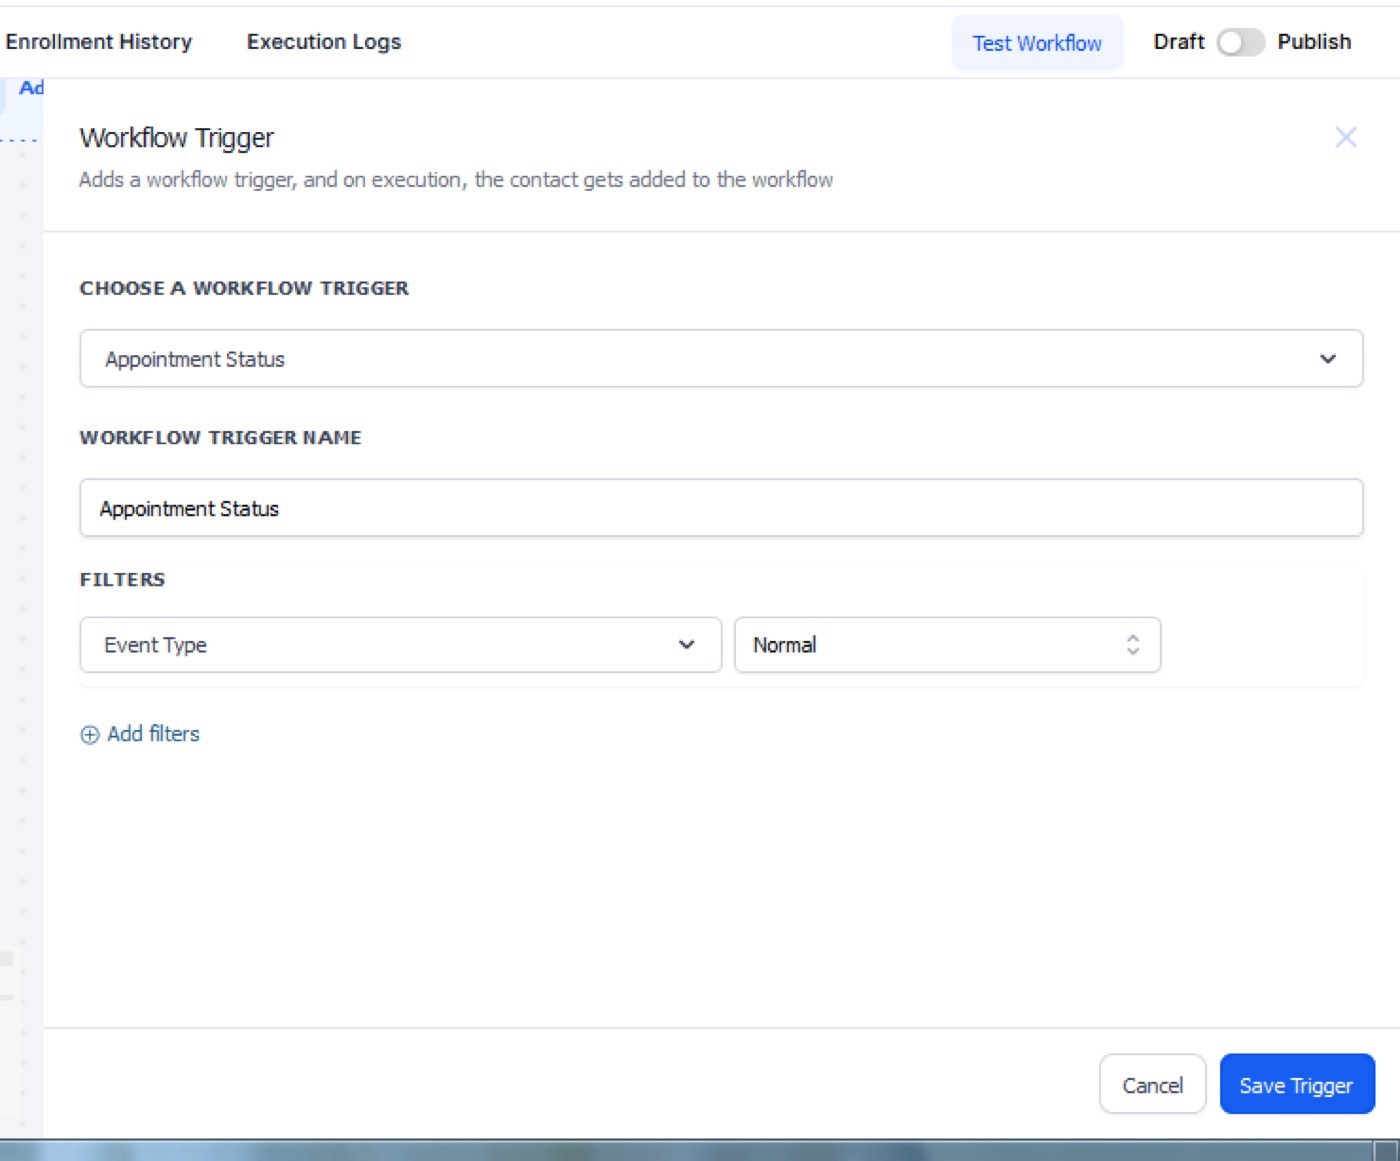
Working on ‘Appointment Status’
Since our task is to create workflow automation for appointments, the next step is supposed to be working on the ‘Appointment status’ feature.
Click on the ‘Appointment Status’ on your trigger features.
Choose the type inside ‘Filters’- Any, Normal, Recurring. You can just use ‘Normal’.
You can also add other filters according to your preference.
Then make the ‘Appointment status’ confirmed.
Save the trigger.
Click on the (+) sign on your actions and search for ‘Internal Notification’. Here you’ll see a bunch of other useful features such as LC Premium Features, External Communications, Affiliate, CRM, Membership Actions, and Conditions and Workflow,
Now, set ‘Internal Notification’ and choose a type of notification. You can, for example, choose ‘Email’.
Then fill in the required fields including ‘Subject’ and ‘Message’ fields. You may also use “Settings’ for this. You can use ‘Custom Values’ and add tags such as contact name, contact email, contact phone number, etc.
Save the action.
Send Email
Now, as you are done with your ‘Internal Notification’ action you can move on to creating an ‘Email’.
Click on the (+) sign to add an action.
Search for the ‘Email’ on the Actions.
Fill in the fields. You may also use ‘Settings’ and tags as long as the user is assigned. Then save the action.
Duplicate
If you want to do things effortlessly and quicker, then use the ready-made recipes inside the Templates.
Click on ‘Back to Workflow’.
Click on ‘Create Workflow’.
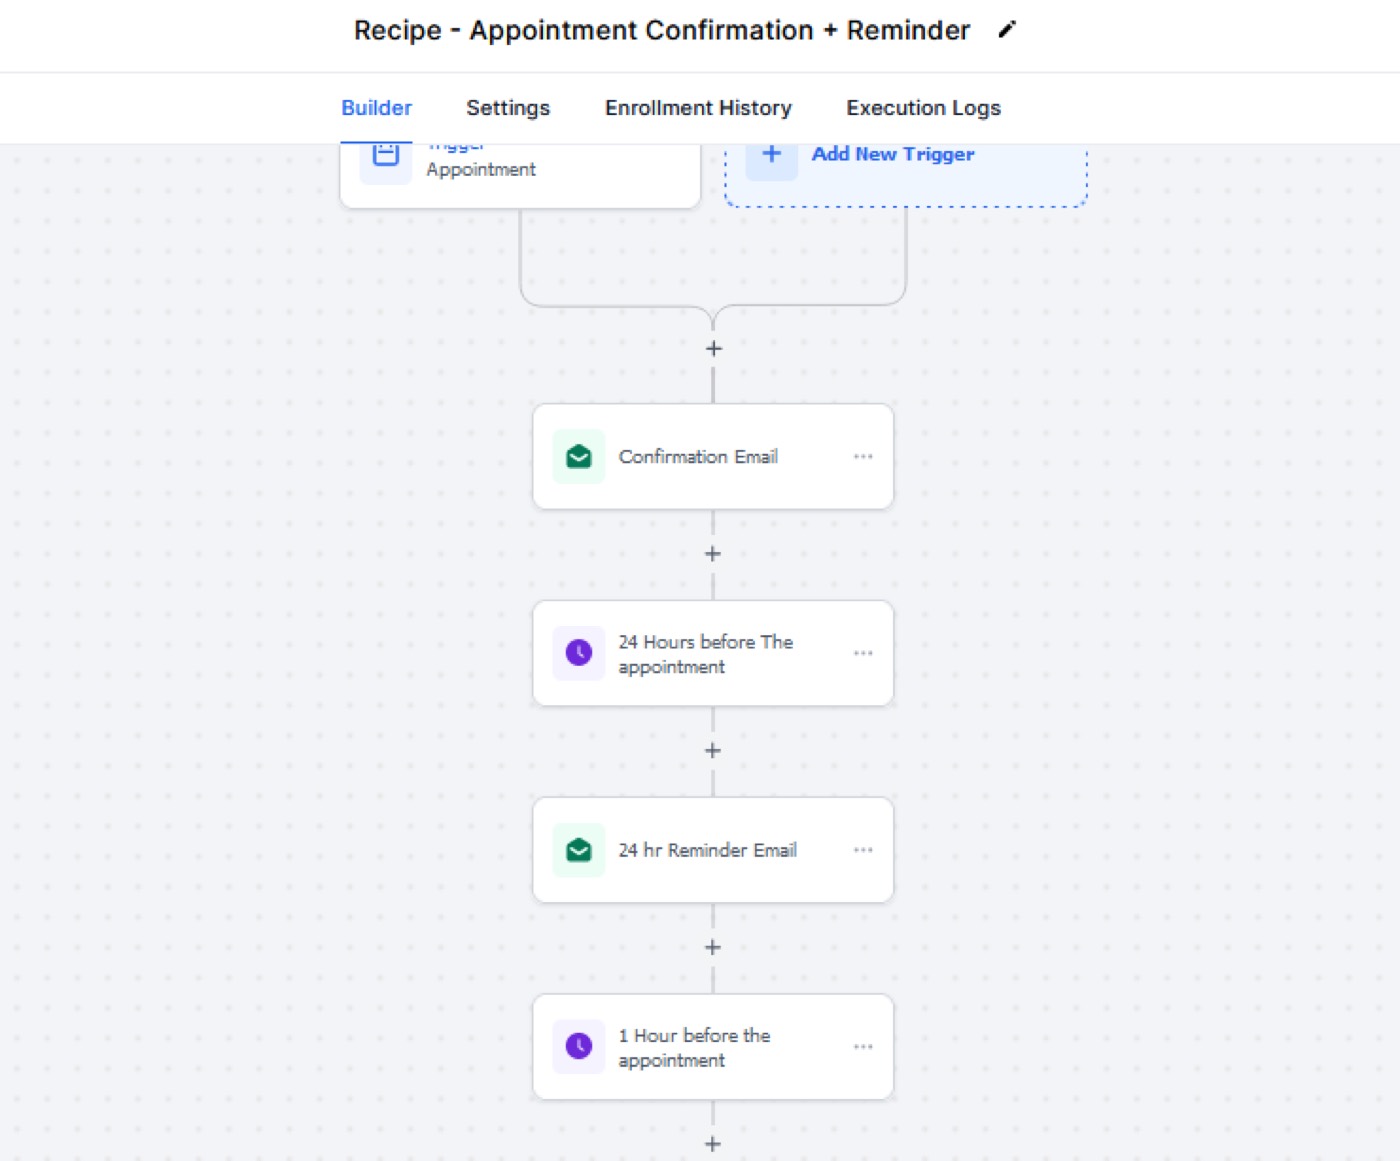
Choose the recipe ‘Appointment Confirmation + Reminder’.
Here you’ll see ‘confirmation email’ inside the actions.
Click on it and copy the message text.
Go to the ‘Actions’ page you have created and paste the text inside the message field. Make any changes you like in the text and save the action.
Send SMS
Next, you can create an action for text messaging using SMS. For this you need
Click on the (+) sign in your actions.
Search for SMS and fill in the fields the same way you did on your previous step using ‘Custom Values’ and the copied text.
Click on ‘Save’.
Wait
After these steps you need to set a ‘Wait’ action for 24 hours before the appointment to send the next reminder. For this you need to
Click on the (+) sign in the actions.
Search for ‘Wait’ in actions.
Click on ‘Wait’. Name the action.
Choose ‘Event/Appointment time’.
Set the time.
Save the action.
Note: You can copy each of the actions and duplicate it.
Workflow Cancellation
In case you want to update something or make changes inside your actions you can again use the Actions window and search fields. Here is how to cancel/remove a workflow.
Click on the (+) sign in your actions.
Go to the Actions window and search for ‘Remove’.
Click on ‘Remove from workflow’.
Click on ‘Another workflow’ and save the action.
FAQs
What are the best strategies to set up workflows in Automatescale?
The best and most convenient way to set up a workflow is using the pre-built templates and recipes inside the platform. This will maximize the productivity of your work and will minimize the time spent on creating a workflow.
What is automation in Automatescale?
The ability to build sequences of actions triggered to specific conditions or events is what we call automation. This process includes a series of actions such as creating tasks, sending messages and updating records.
★ Want this built for you? AutomateScale deploys the AI agent layer, funnels, and automations behind this — for agencies, SaaS founders, and coaches. Apply for a strategy call or subscribe to The Scale Brief.