Introduction:
It’s not a secret that the calendar designed inside the Automatescale platform comes with a number of features and powerful tools. As an online business owner you can use those tools for appointment bookings.
Today we’ll discuss how you can create book appointments in the Automatescale calendar all by yourself. Keep an eye on this tutorial-guide and find out the best way to use Automatescale calendar. After reading the article you’ll also learn how to use AI appointment bookings.
Automatescale Calendar
First, enter your account in the Automatescale. If you don’t have an account, you can register and create an account in minutes.
Then go to ‘Calendars’ on the left side of the page.
Here you see calendars between which you can choose a calendar for staff members, or book a time with them.This is where you can also book appointments.
So, go forward a few weeks on the calendar.
Choose a calendar of someone on the right of the page.
Then book an appointment for the chosen person.
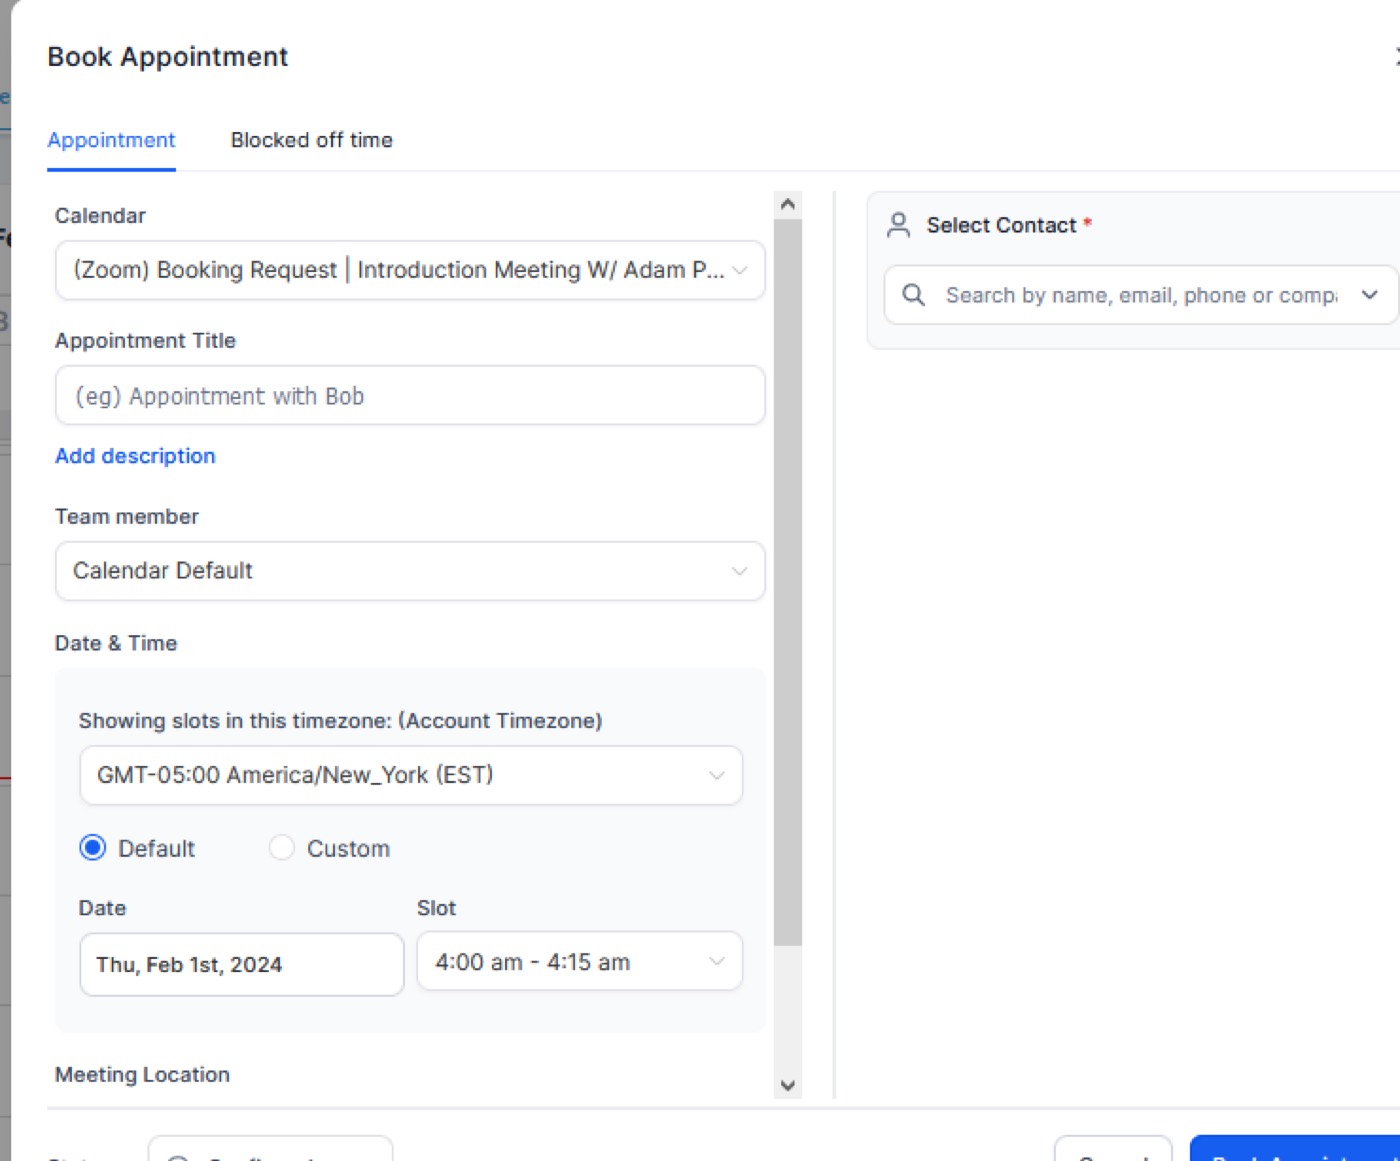
How to Book an Appointment
There are 2 ways to book an appointment; Manually and Automatically.
Manually: on the top left of the page you see 'Create group' and 'Create Calendar'. Click on the second square. Now you can choose ‘ Book an appointment’ and then choose the contact you want to book an appointment with. This is convenient for one-time appointments.
Automatic: you can embed a calendar for automatic bookings. Any calendar you create has its widget link which allows you to embed the calendar on the website, landing page, or sales funnels. This feature lets people directly book a slot. It’s convenient for group appointments.
The widget is available in different languages and comes with available days and times for the person to choose the most convenient slot. When the booking is confirmed it appears on your calendar. It can include the person’s name, phone number and email.
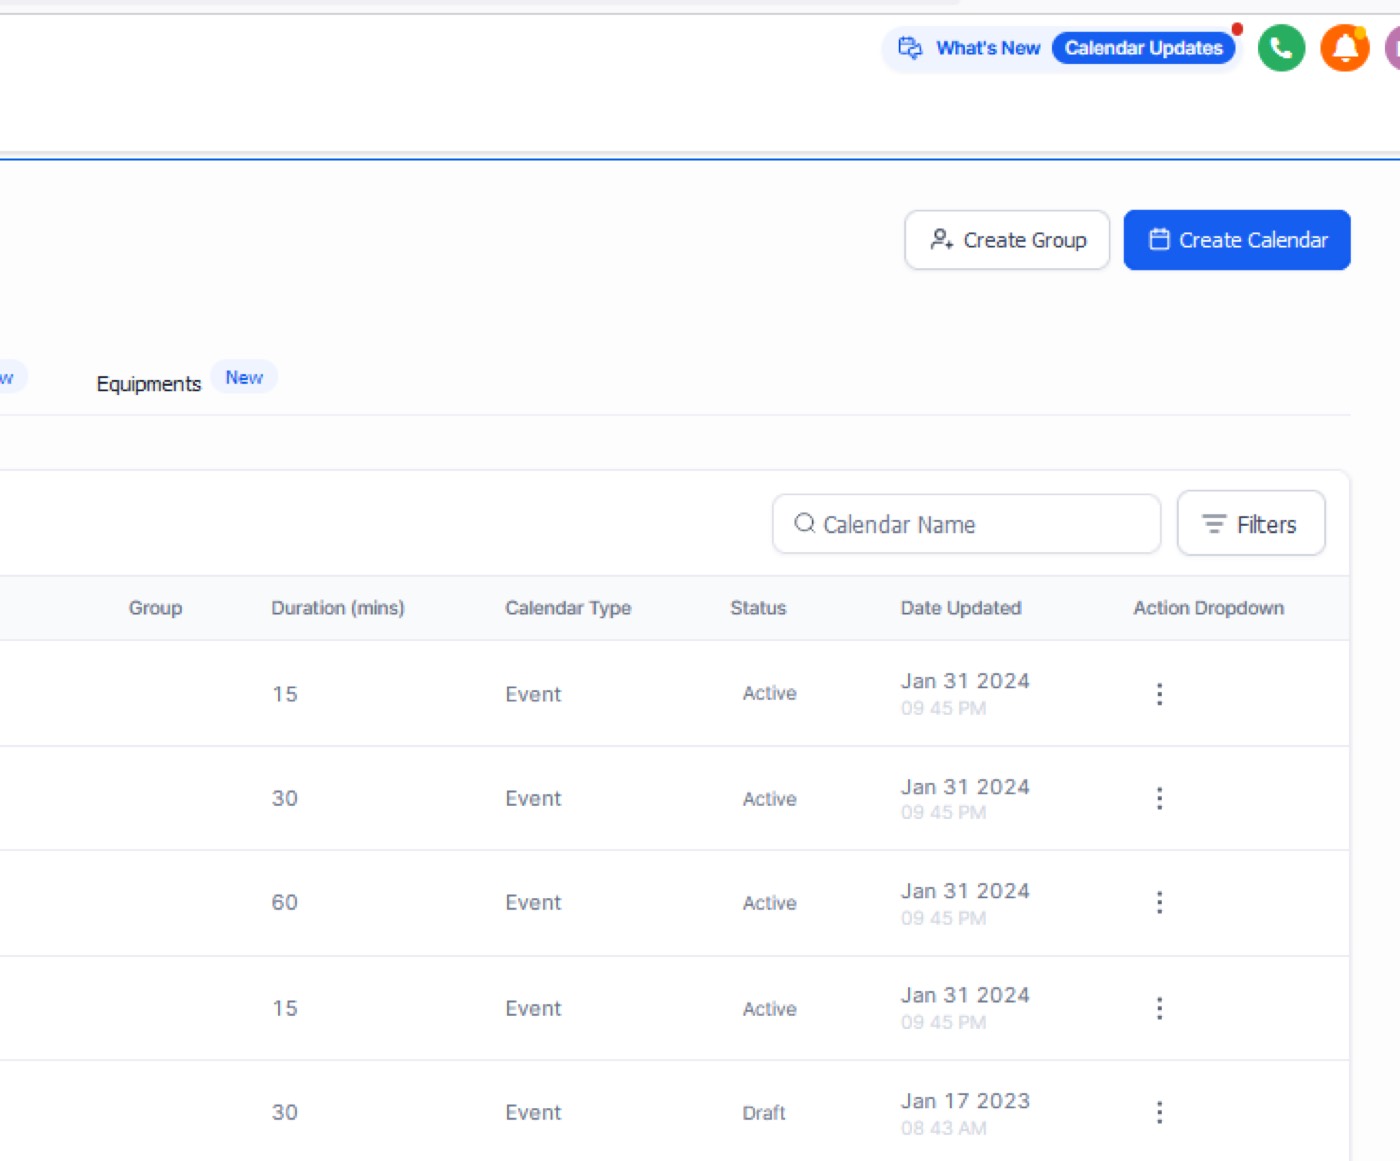
Set your Availability and Schedule
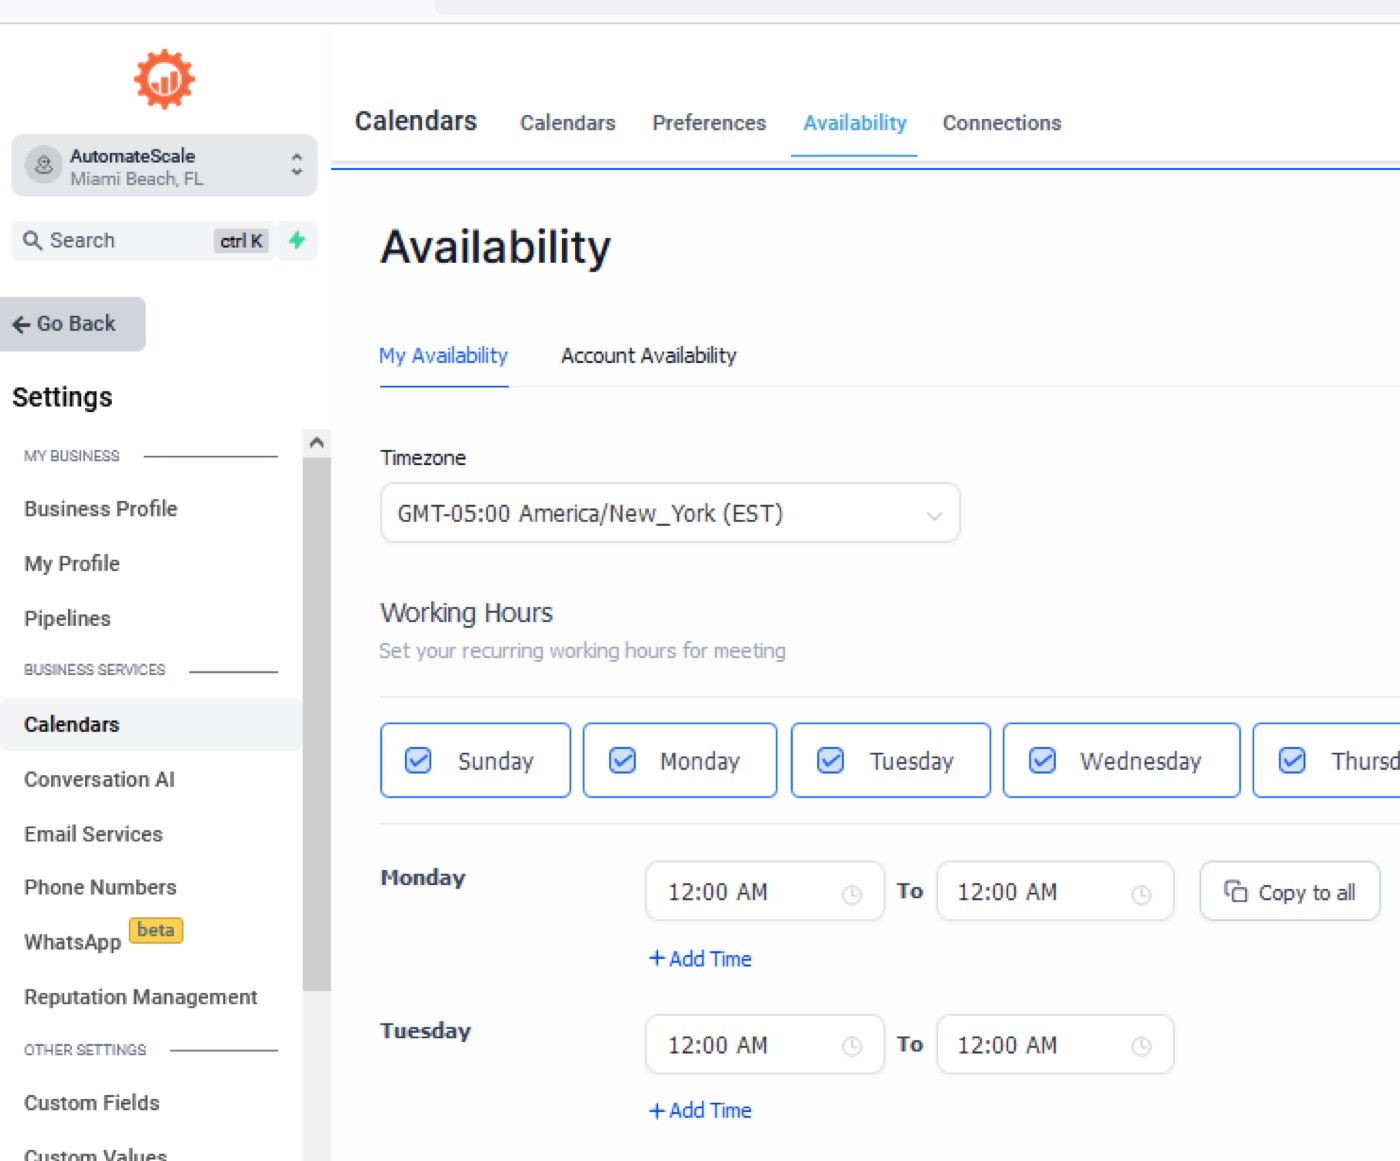
It’s obvious that you physically can’t be available 24/7 but since appointment bookings can come anytime, you can set your availability and schedule your calendar. This also helps to avoid becoming overworked and overbooked. There are several parameters available inside the calendar you can use to set your availability. Here they are:
Slot Duration: this determines the duration of each appointment slot.
Slot Interval: this determines the frequency of the slots’ availability. It shows when people can book appointments. For instance, you can set a 30-minute or 1-hour slot interval for bookings.
Buffer Duration: this is the break time between appointments that gives you some breathing space.
Appointments per slot: this allows to match the number of people with your availability.
Appointments per day: you can set a maximum limitation for appointments you are willing to have per day.
Scheduling notice: use this feature to avoid last-minute appointment bookings.
Office hours: you can set days and hours for your availability for appointments.
Calendar for Each Service or Event
It has become easier to organize your daily workflow and schedule appointments for each service or event directly on your Automatescale account. Now you can create a separate calendar for each service or event and it will work automatically. Even if you have several events or services that go under the same group, you can still create separate calendars for each of them.
AI Appointment Booking
One of the most powerful features to use at Automatescale calendars is the AI Appointment booking bot. First , make sure you enable the ‘Conversation AI’ inside your company account and let's get started with AI Appointment booking from scratch.
Go to Automation on the left side of your Automatescale account page.
Go to Workflows and click on ‘Create workflow’.
Once you click on it, it gives you templates. Click on ‘Start from Scratch’.
Now you see the ‘Builder’ page. Start with renaming the page on the top middle called “New Workflow’. You can name it as ‘AI bot’.
Next, you need to add a trigger. Click on ‘Add new workflow trigger’. Search for ‘Customer replied’. Add a trigger name such as Instagram, SMS, etc. Then you can select filters.
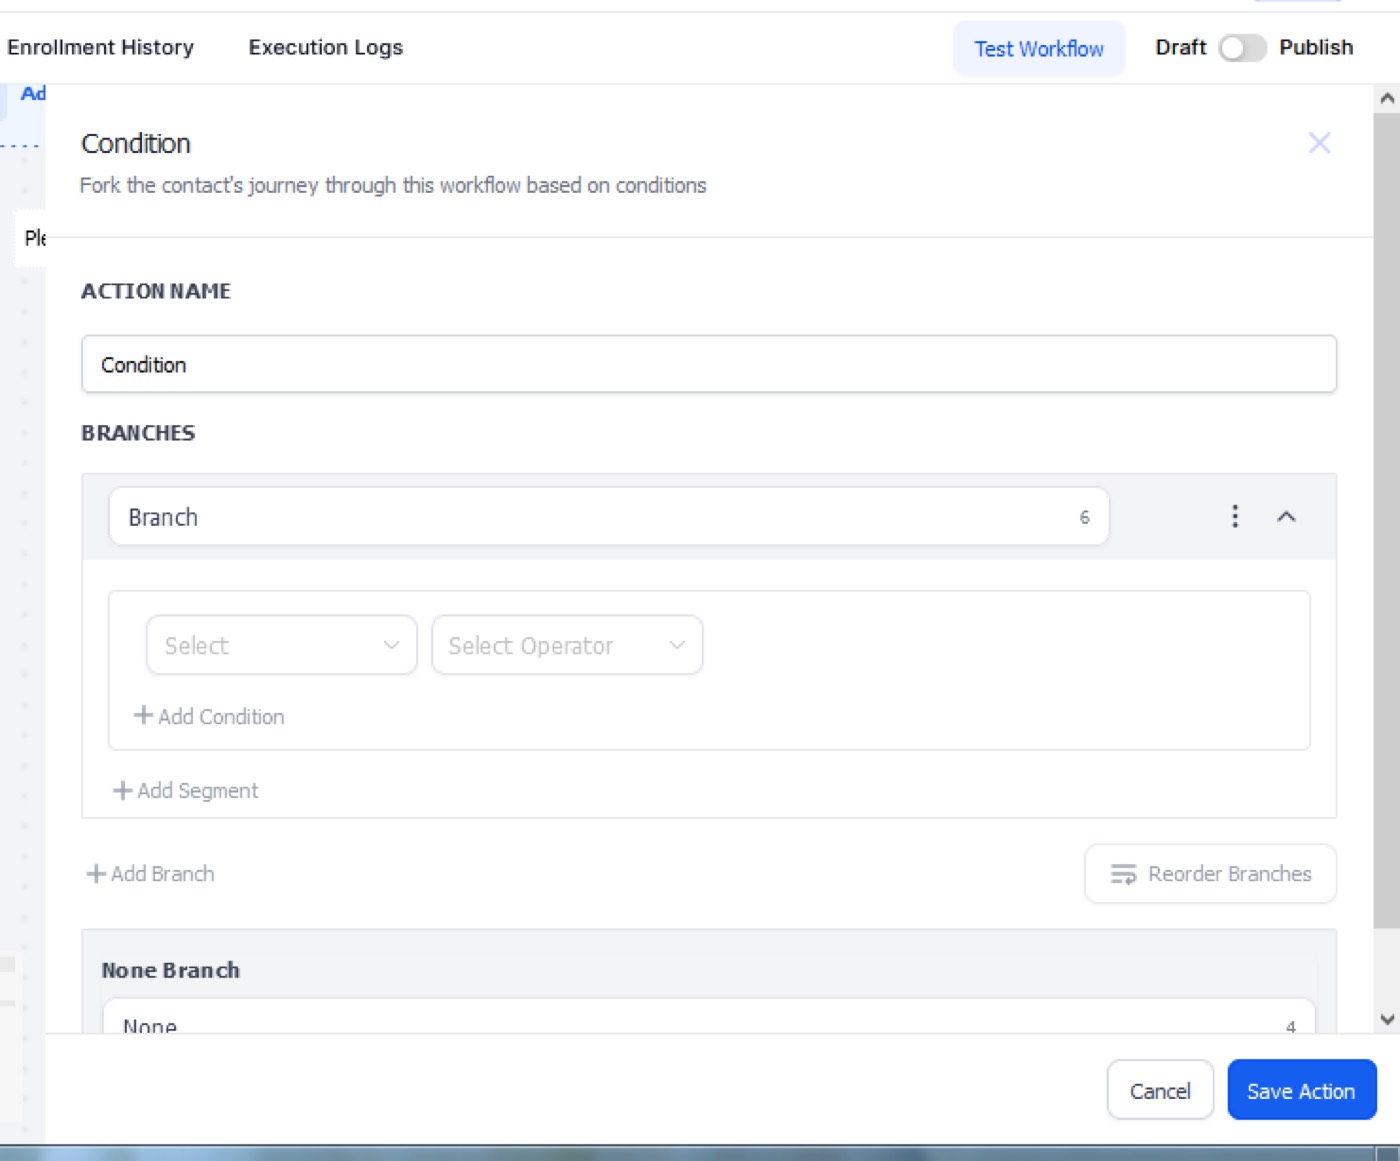
Next, create an ‘if or else channel’. You can find it on the right side of the page. Once you click on it, you see a ‘Condition’ window. Here you need to create ‘Branches’ such as SMS or Instragram, and then add segments.
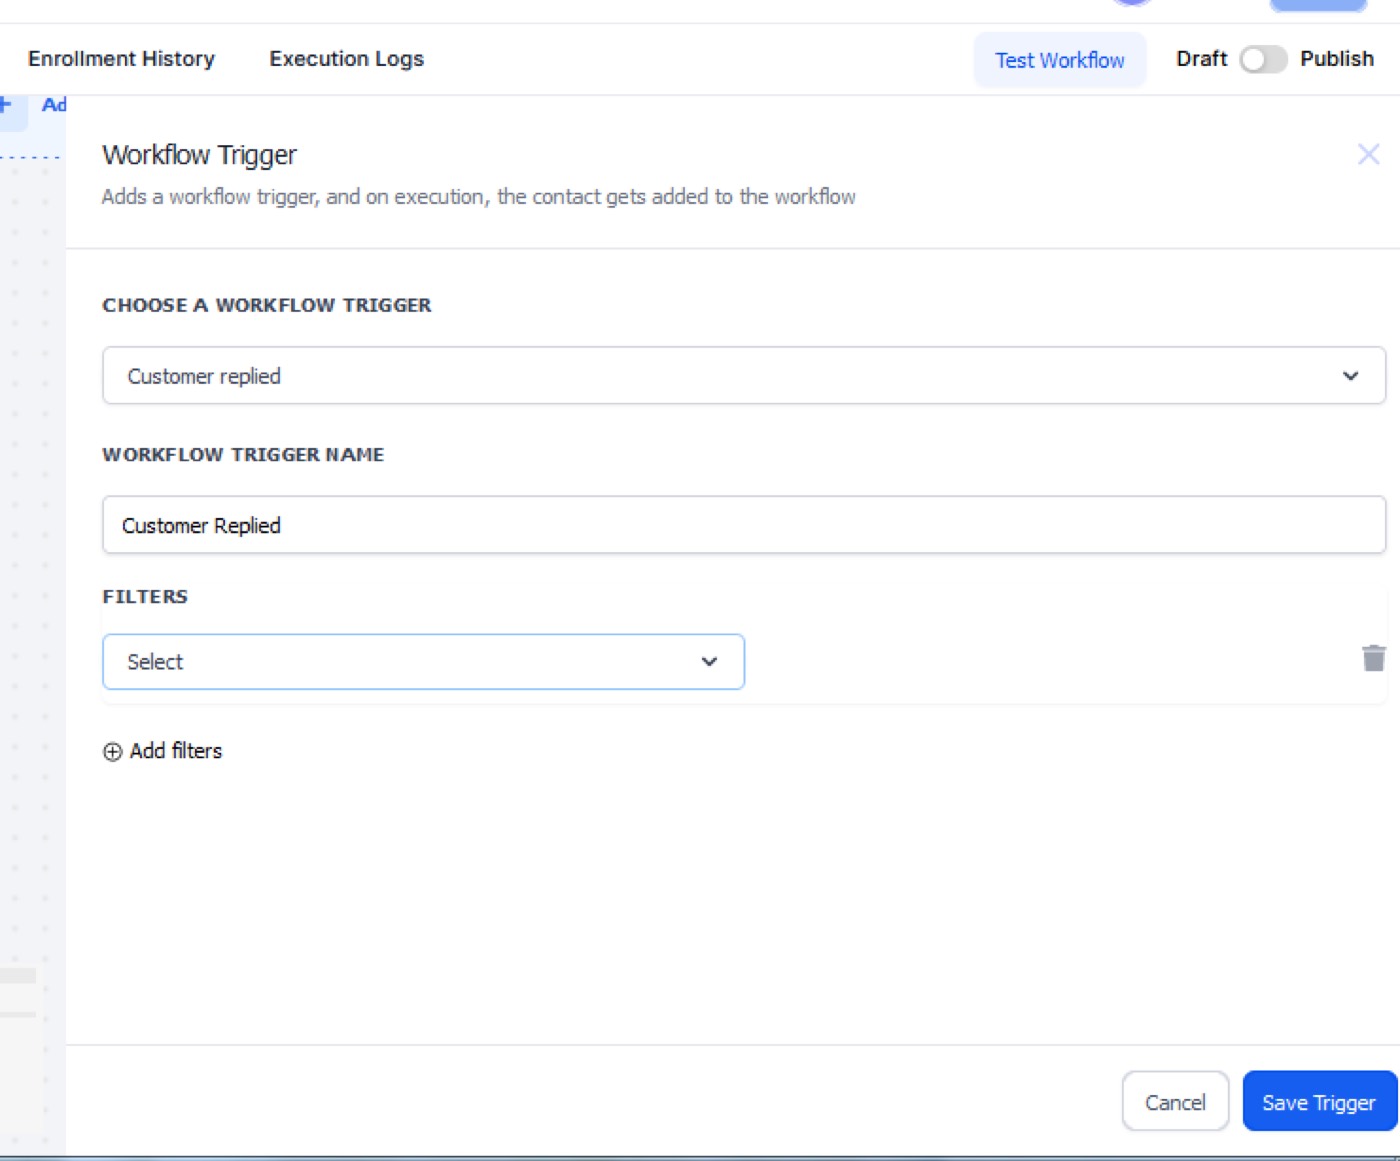
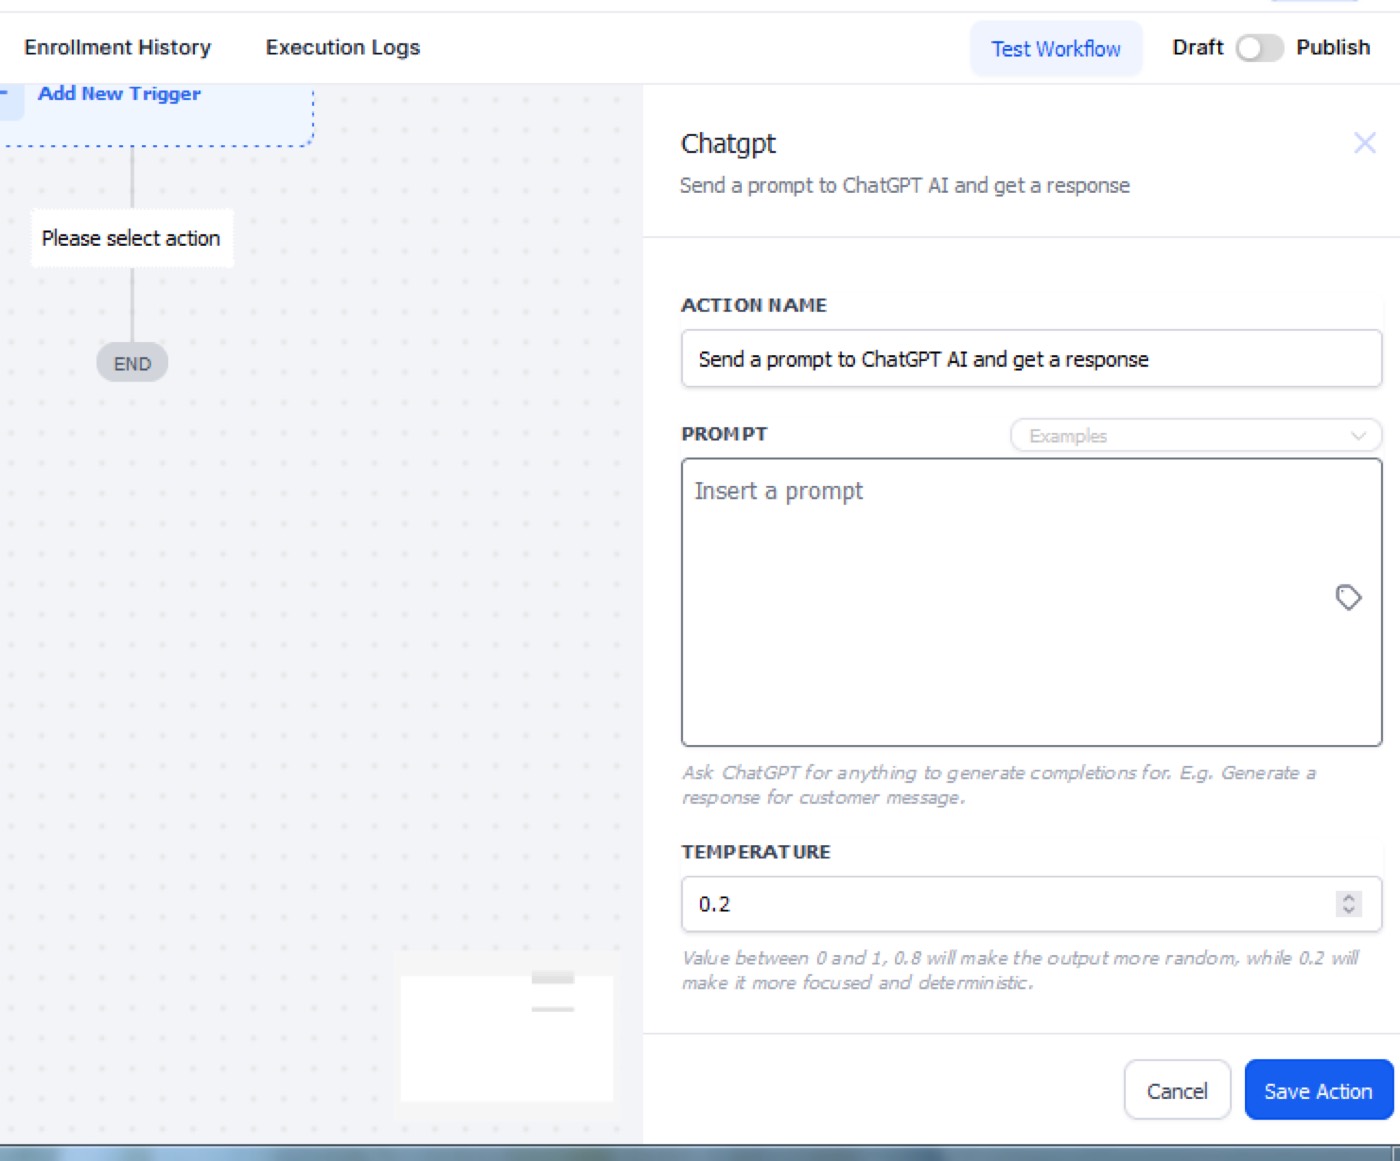
Once you are done with the triggers, you need to create a prompt inside ChatGPT so that it could include some sort of information related to the message you receive.
Click on the (+) sign under one of your triggers. It asks ‘Please select action’. Choose ChatGPT on the right window called ‘Actions’ that appears on your screen.
Insert a prompt according to your business needs, service and suggested product.
Make sure you personalize the prompt. Then save the action.
Next, continue with the ‘Actions’ window. Search for SMS. Click on ‘Send SMS’. Select a template, and do custom values.
At this step, click on ‘Custom Values’, ChatGPT, ‘ #1 Send a prompt to ChatGPT AI and get a response’. Then click on ‘Response’ and click on ‘Save’.
Note: You can do the same for the rest of the channels you have added to your triggers.
How to use the ‘Wait’ Feature
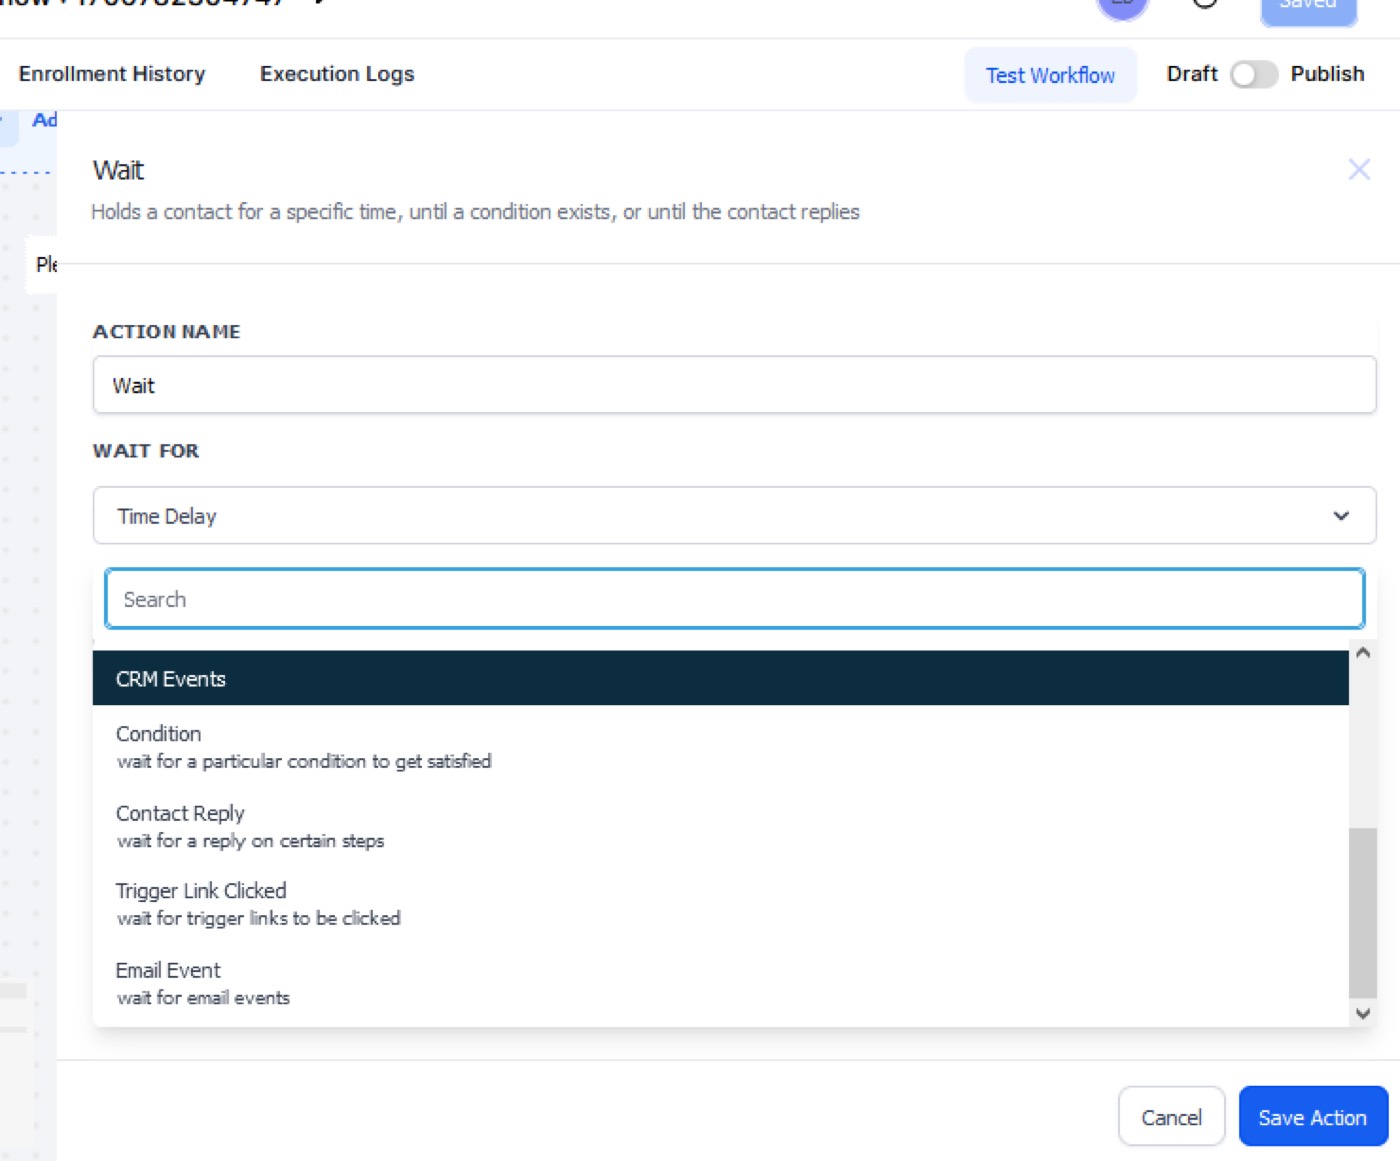
In order to hold the contact for a specific time until a condition exists or until the contact replies, you can make the desired changes in the ‘Wait’ feature. Each of the created triggers inside the “Actions’ has a (+) sign. So click on it to start working with the ‘Wait’ feature.
Go to ‘Actions’ and search for ‘Wait’. Click on it and look for ‘Contact reply’ under the ‘Wait for’ field.
Then select a channel for the next field. It could be SMS, Instagram, Email, etc.
You can also activate the ‘Timeout’ button but it’s optional.
Finish this step with the ‘Save the action’ button.
Create More Conditions for Booking Appointments
Now, as you are done with the basic features, you can proceed with creating more conditions for booking appointments. For this you need to:
Go to ‘Actions’. Search for ‘if/else’. Click on it and create branches such as ‘If customer replied=true’ and ‘if customer replied=false’ and save the actions.
You can do it for each of your channel triggers by clicking on the (+) sign.
You can create several other branches if you like. It will allow you to make the messages more customizable to your AI prompts and responses when the user sends a message.
★ Want this built for you? AutomateScale deploys the AI agent layer, funnels, and automations behind this — for agencies, SaaS founders, and coaches. Apply for a strategy call or subscribe to The Scale Brief.